Home Inspect: Scan & Sketch
For iPhone, iPad and Mac

Sketch the whole home.

Scan the rooms, draw the siding, the roof and the fence, shoot the photos, and send one PDF. Every project lives in your own iCloud.

See how it works Coming to the App Store
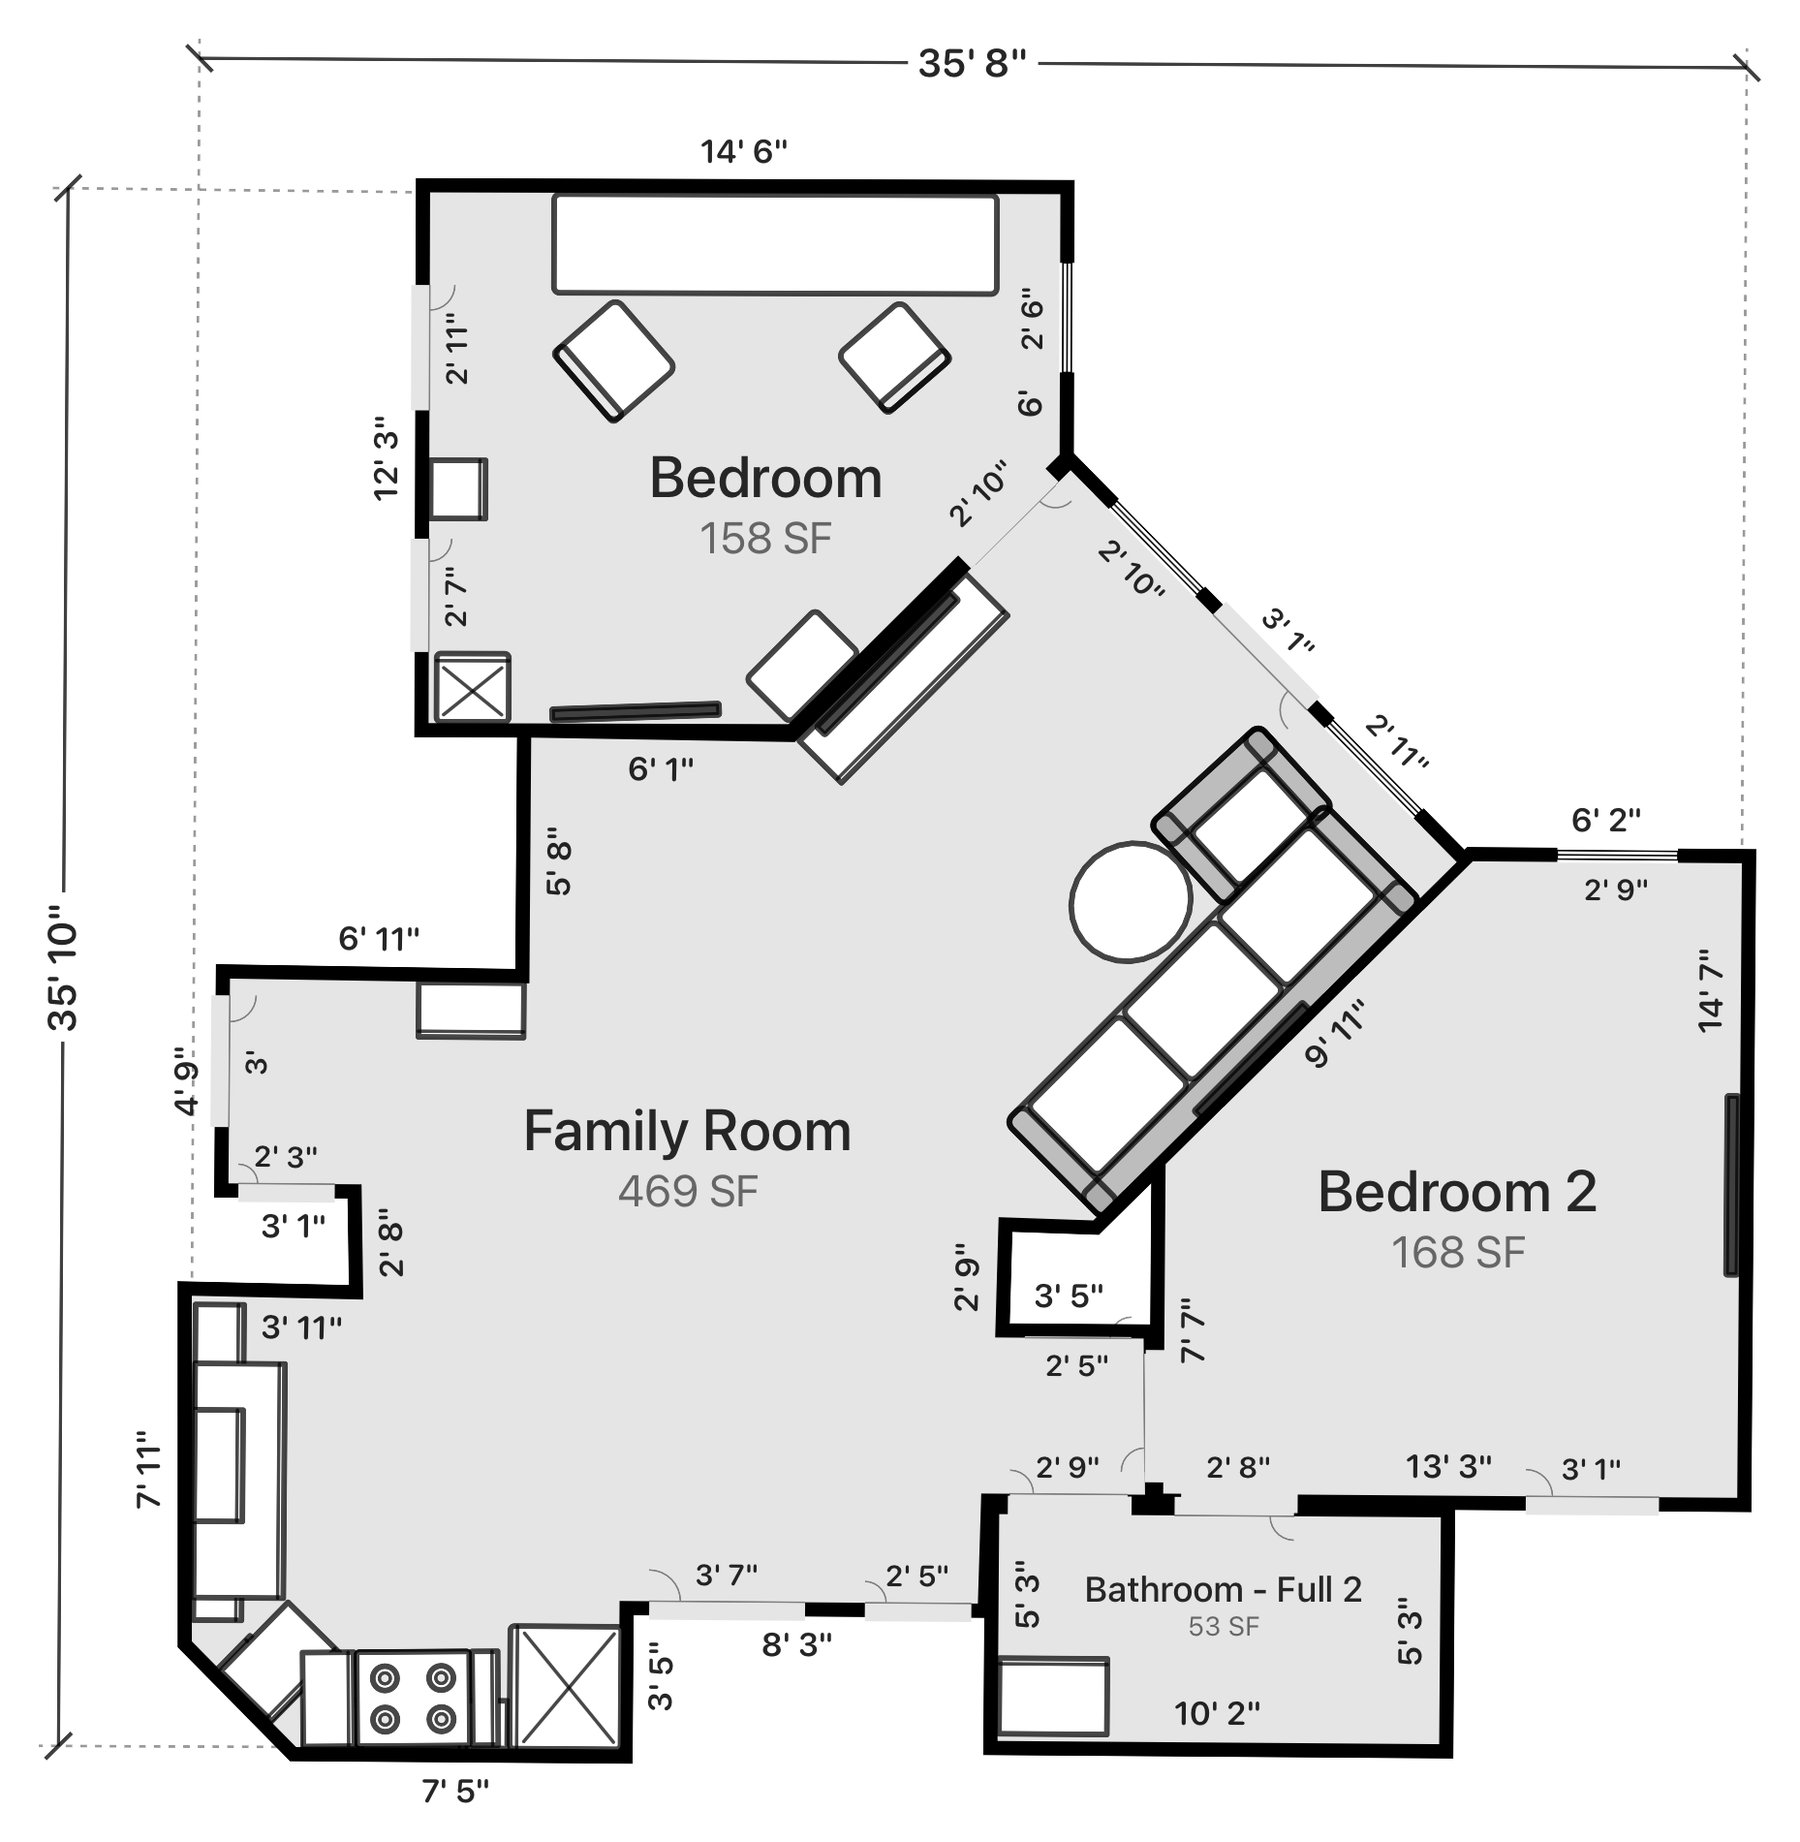
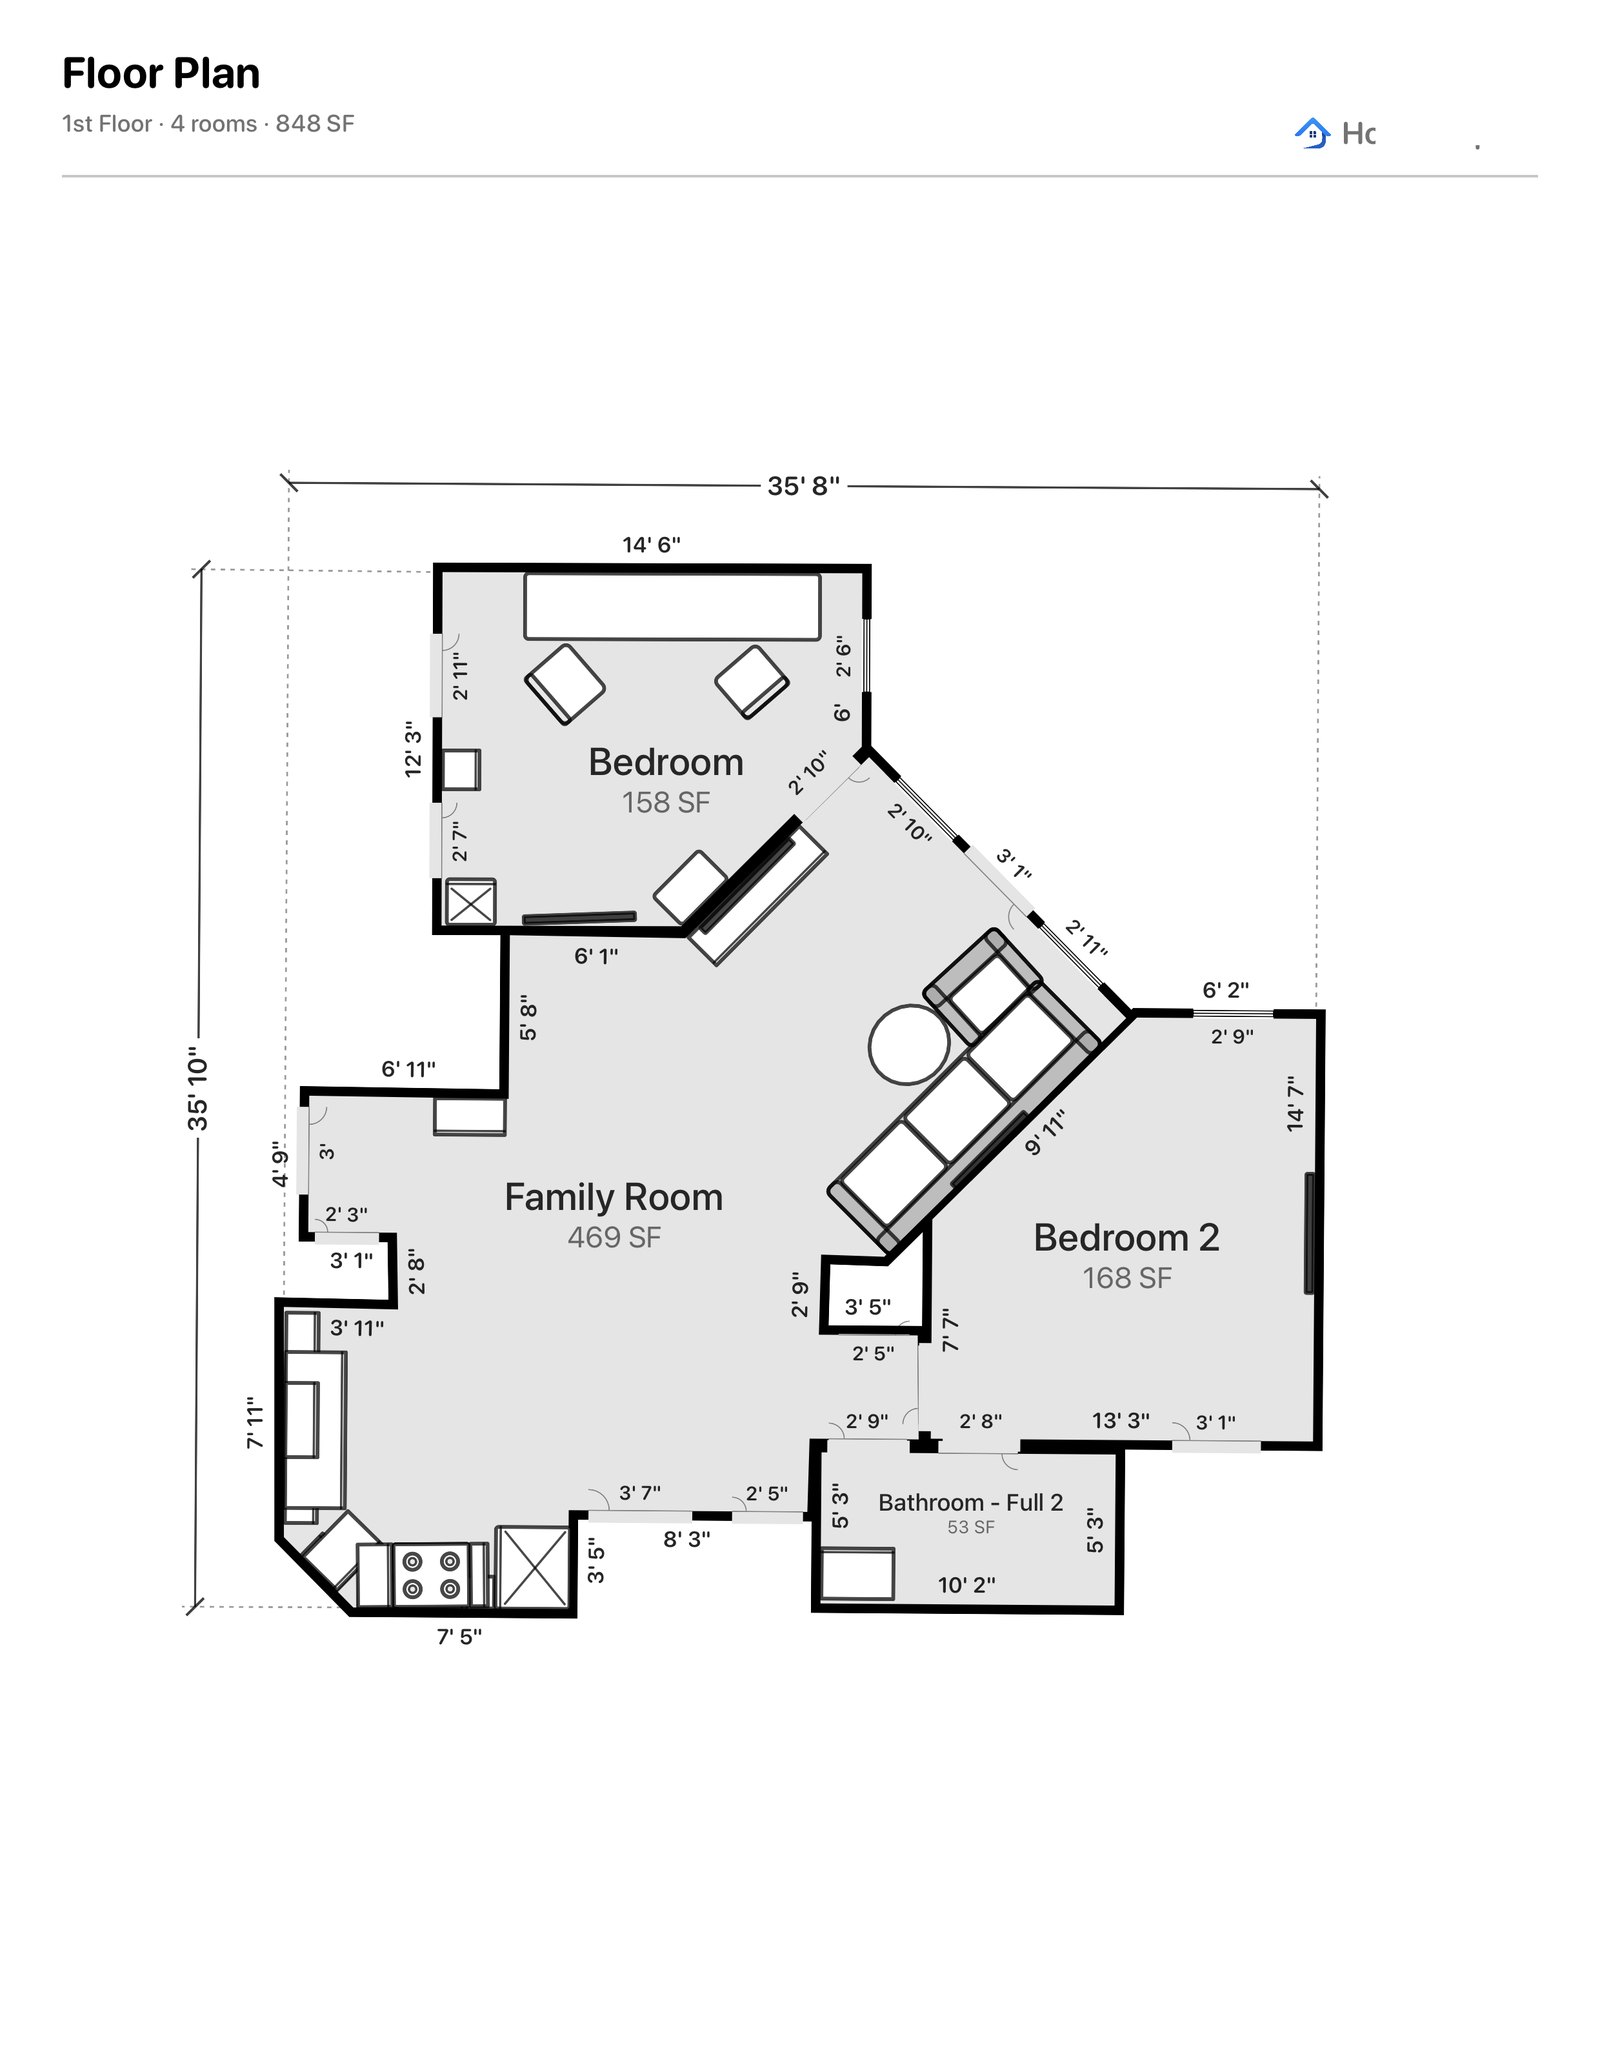
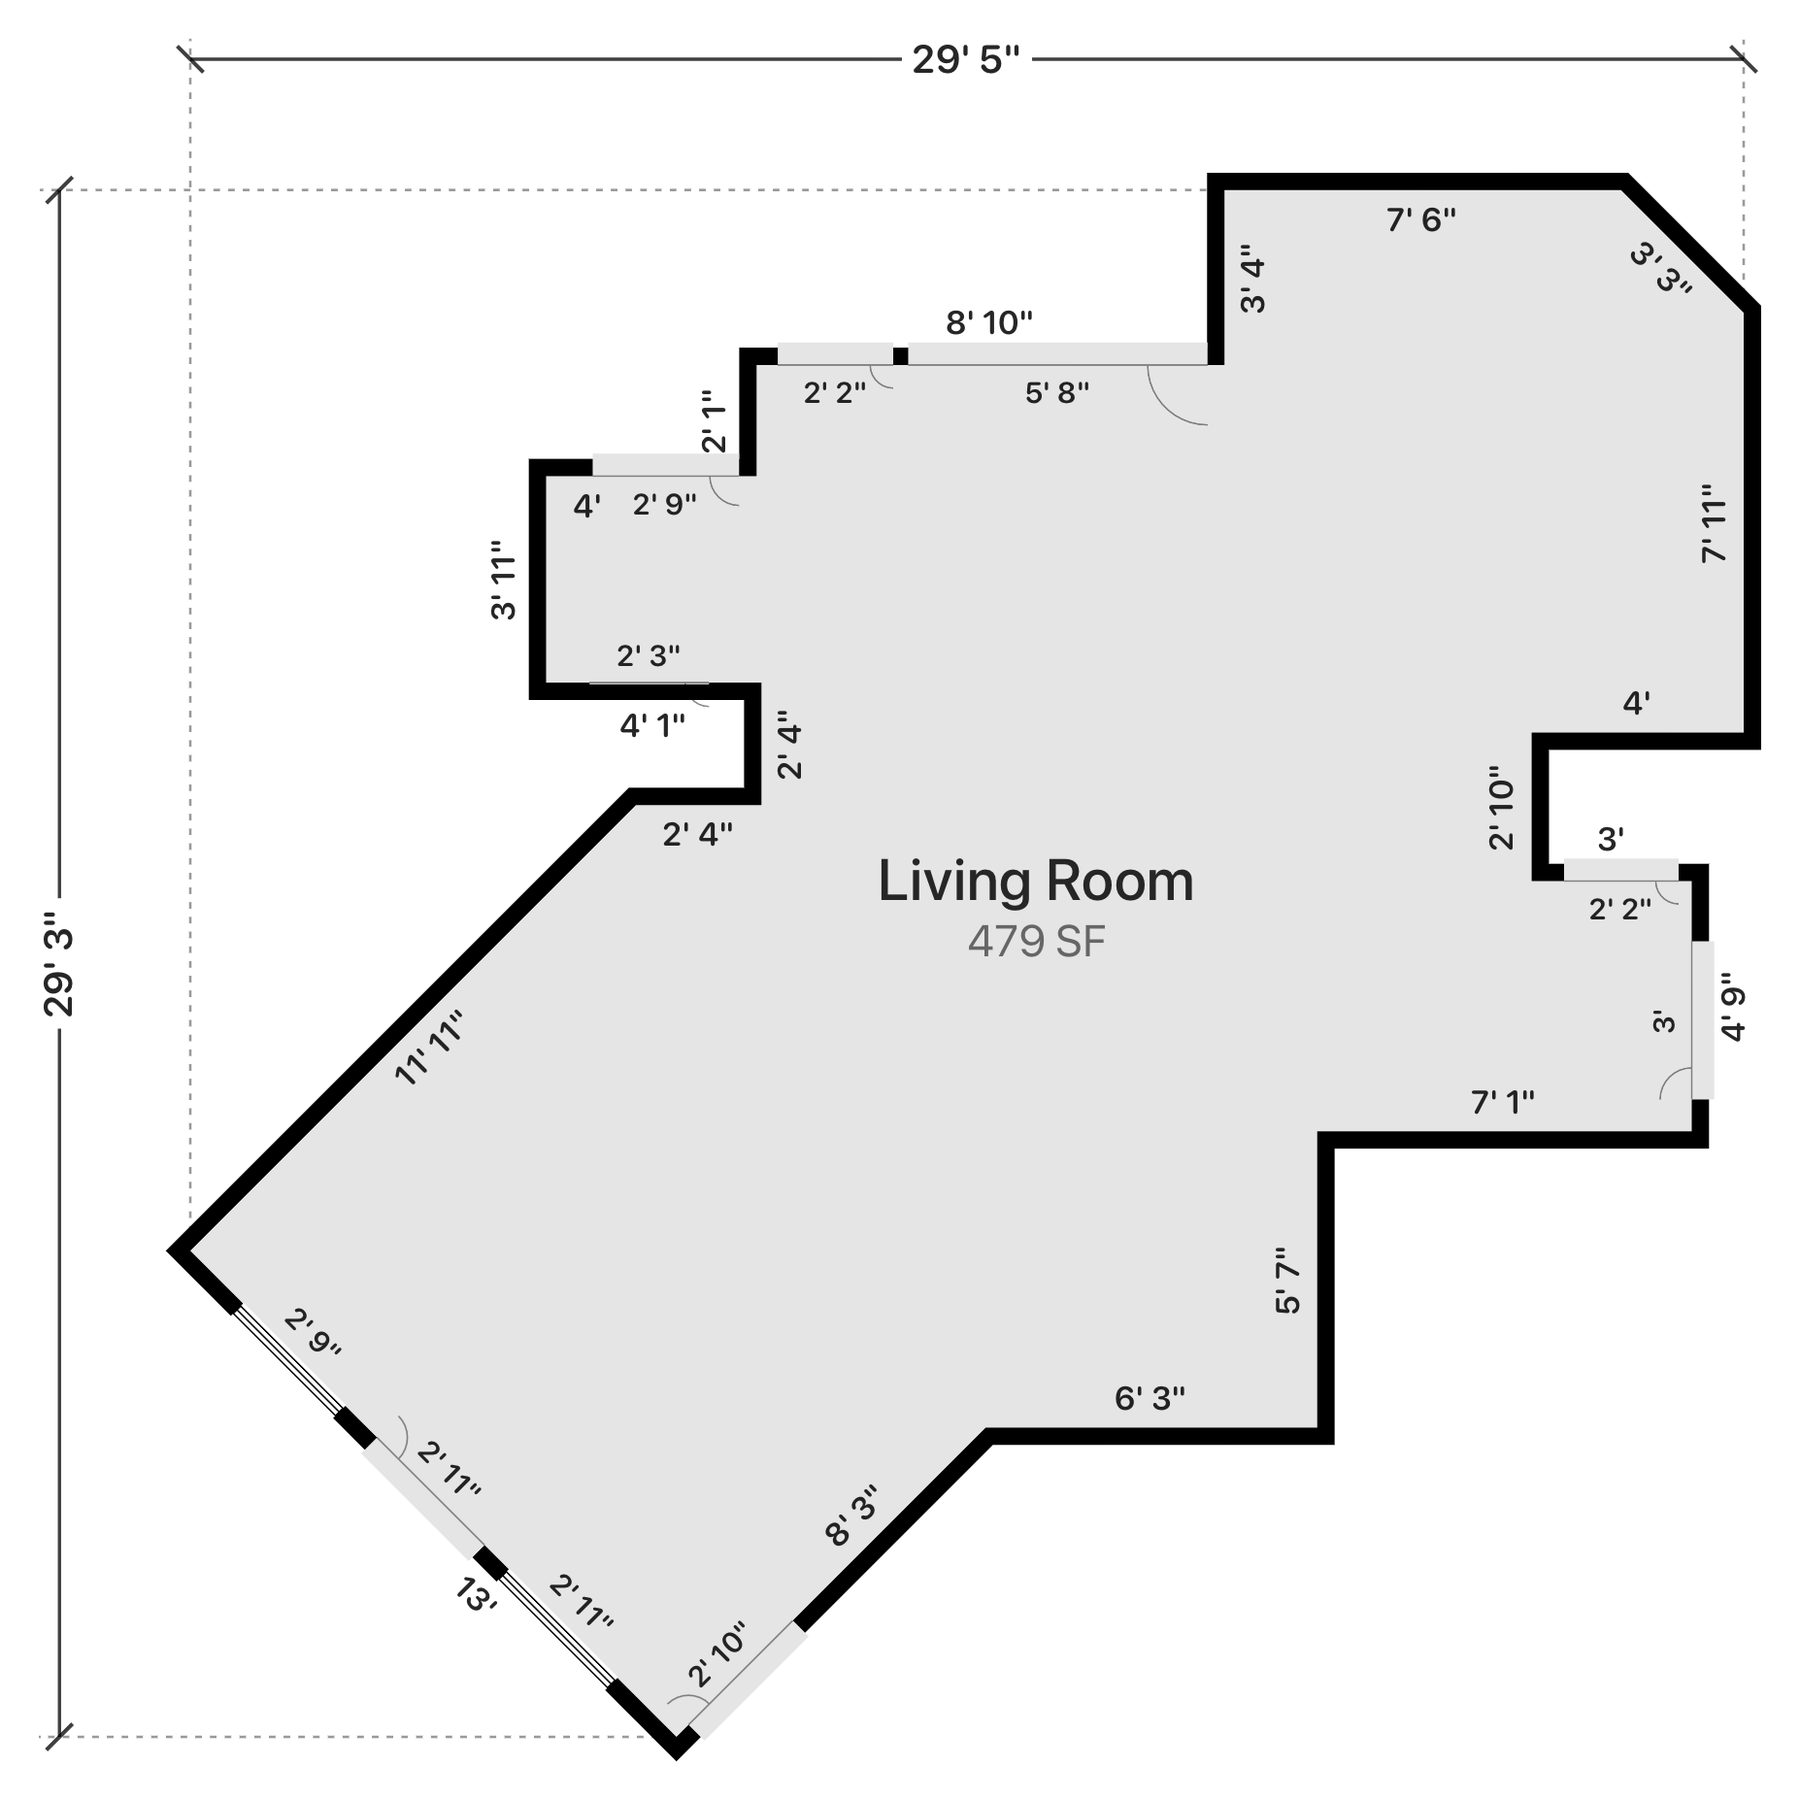
A home's floor plan from a LiDAR scan: every room with its area, every wall's length, the furniture
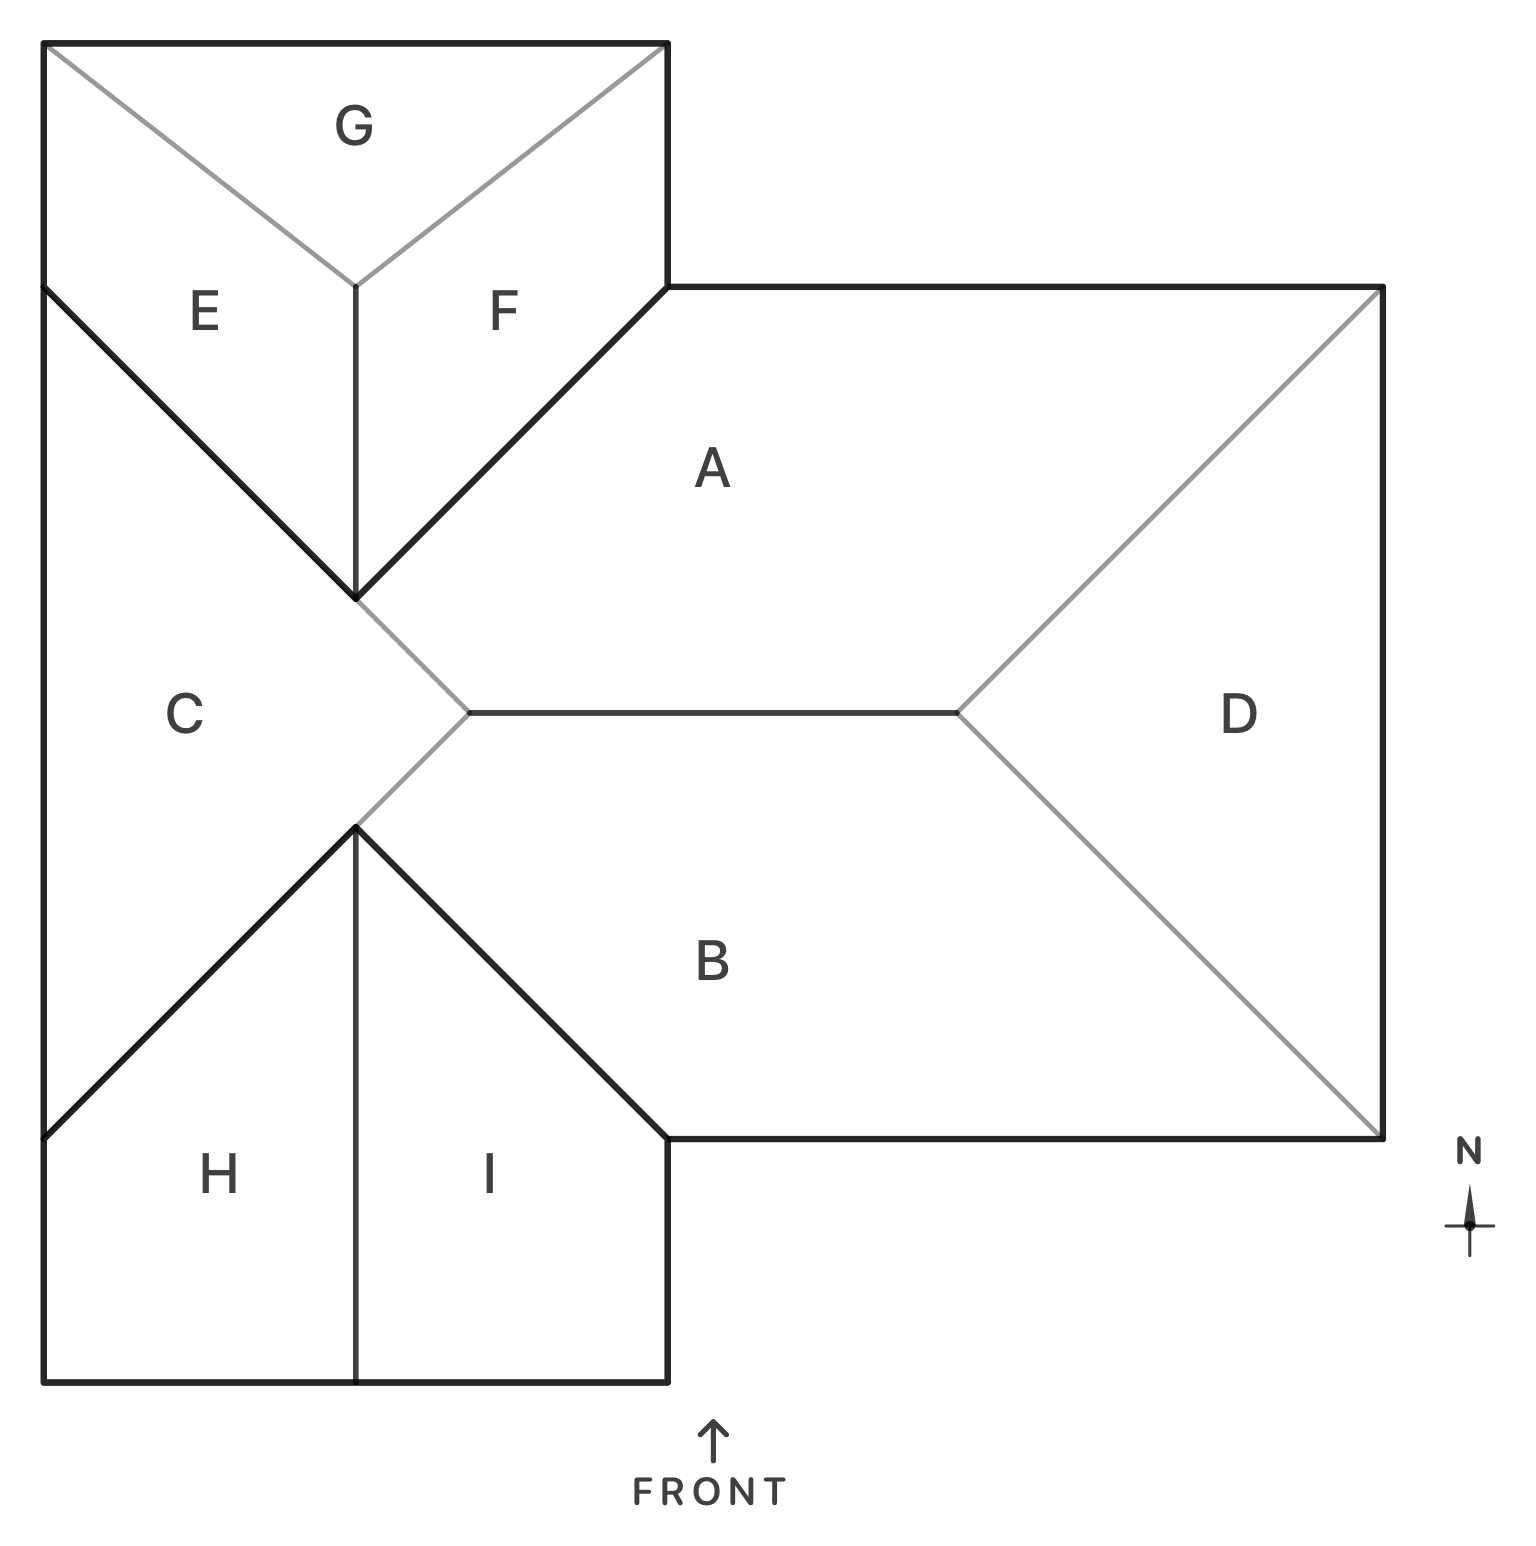
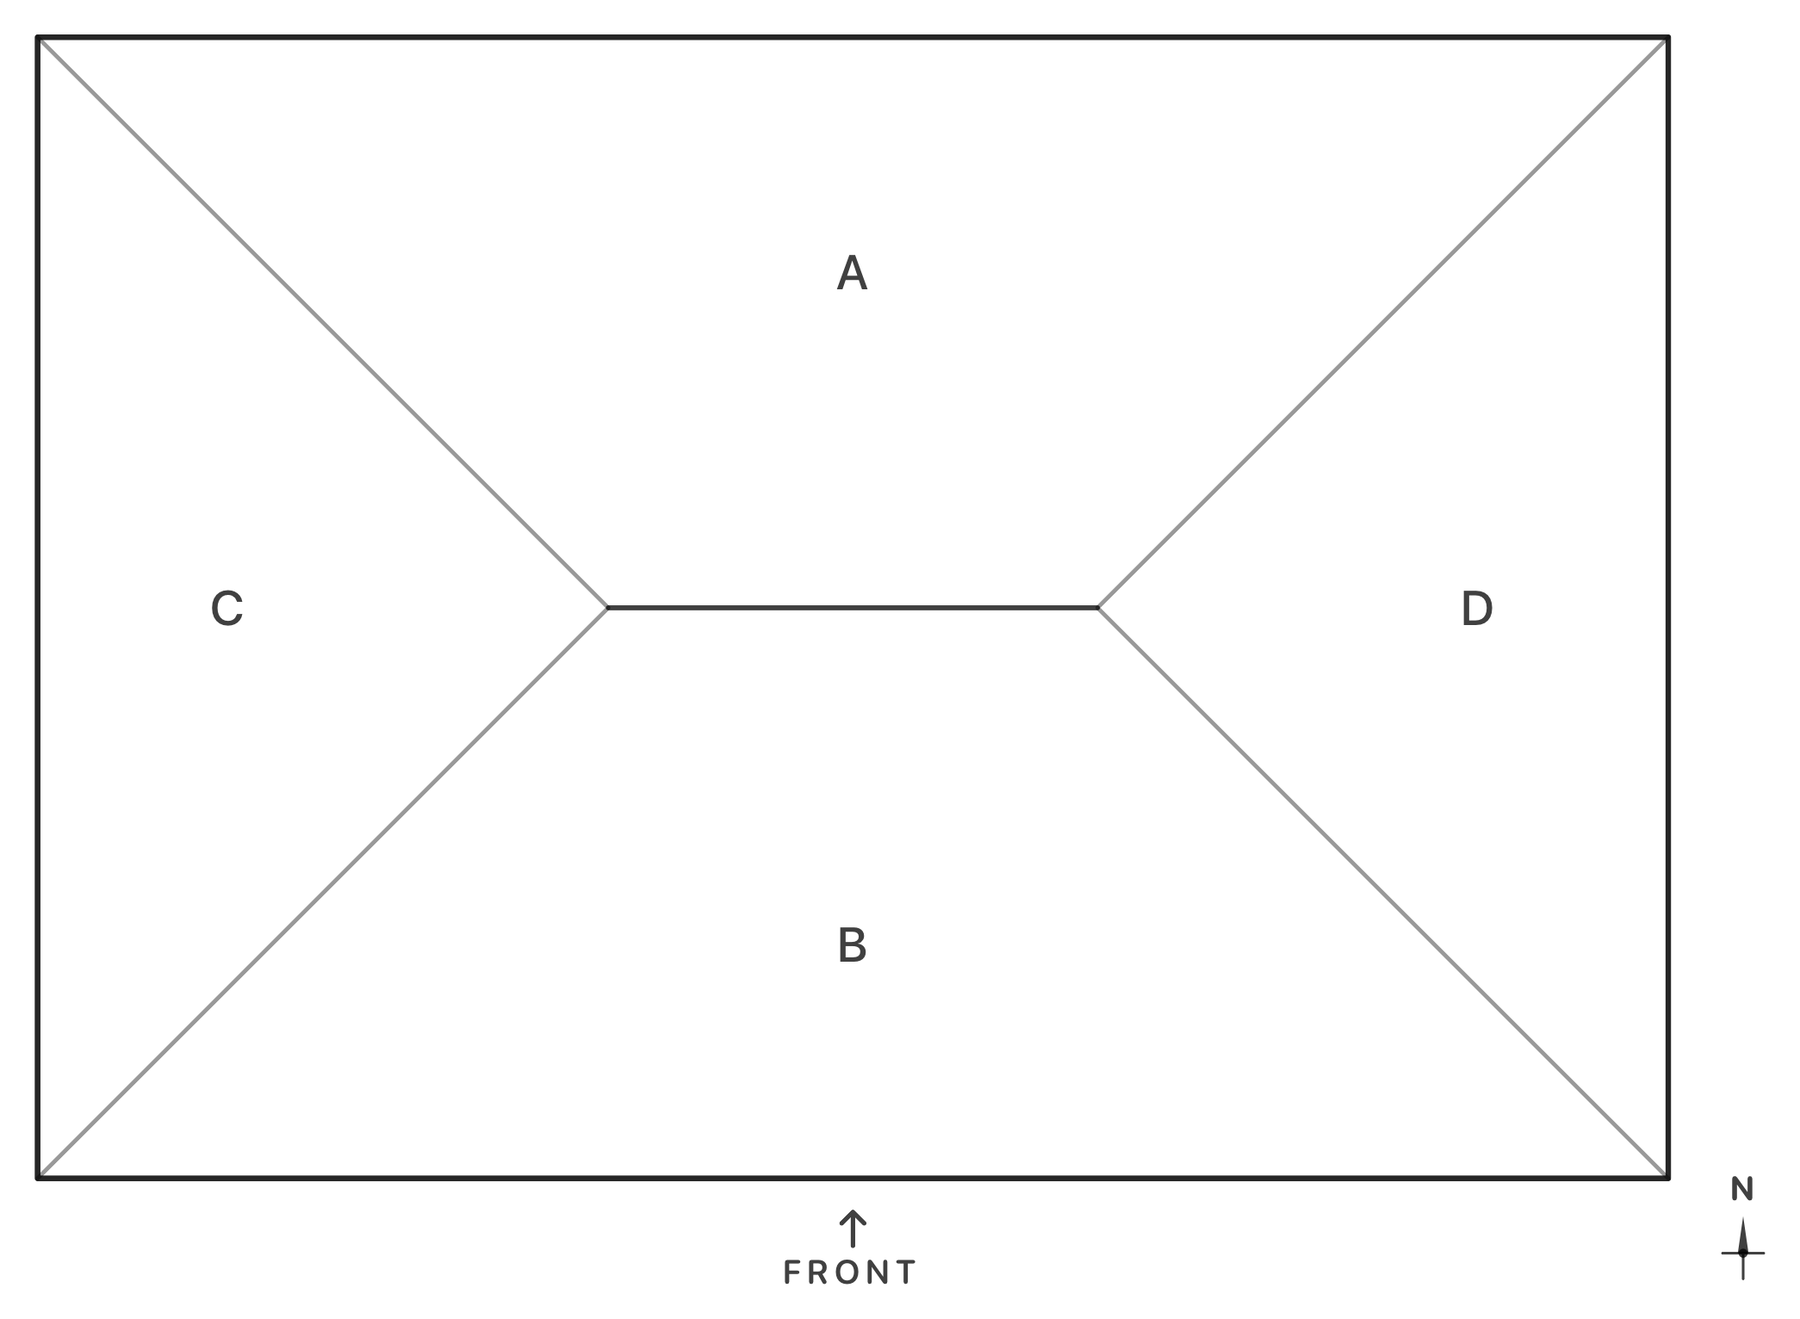
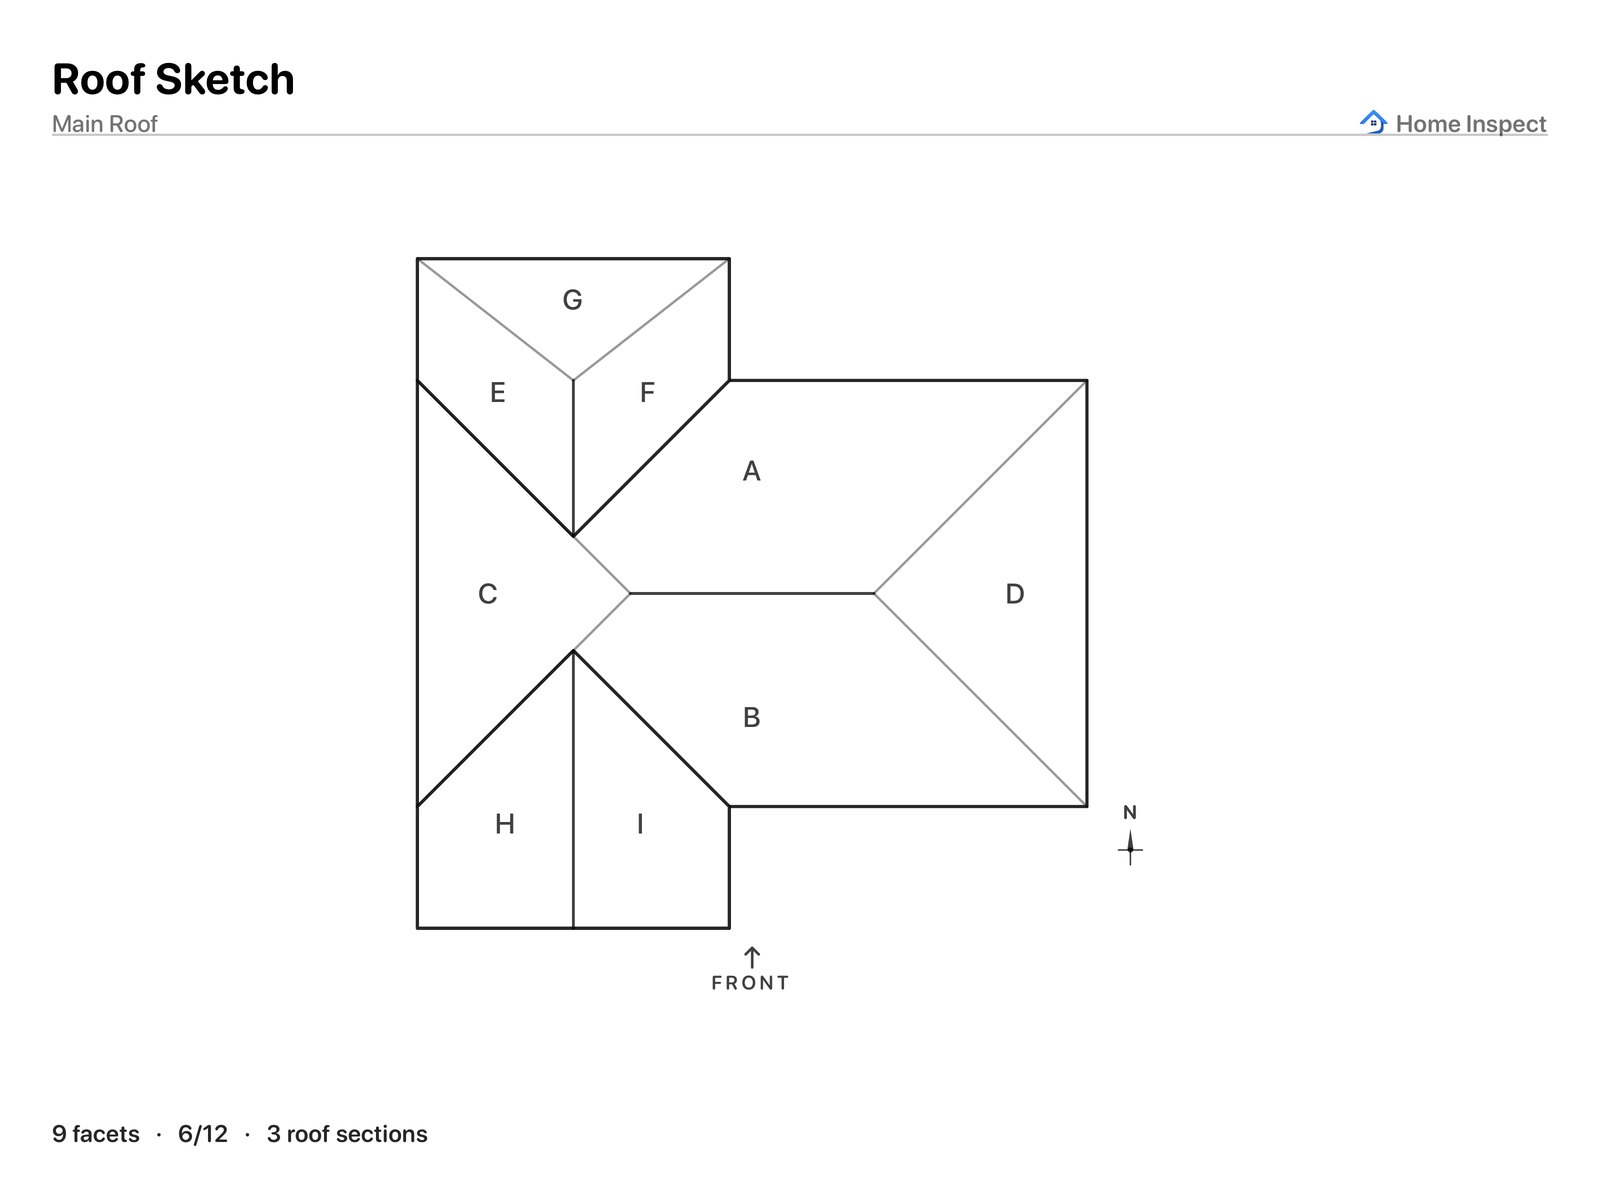
A roof drawn from above with lettered facets
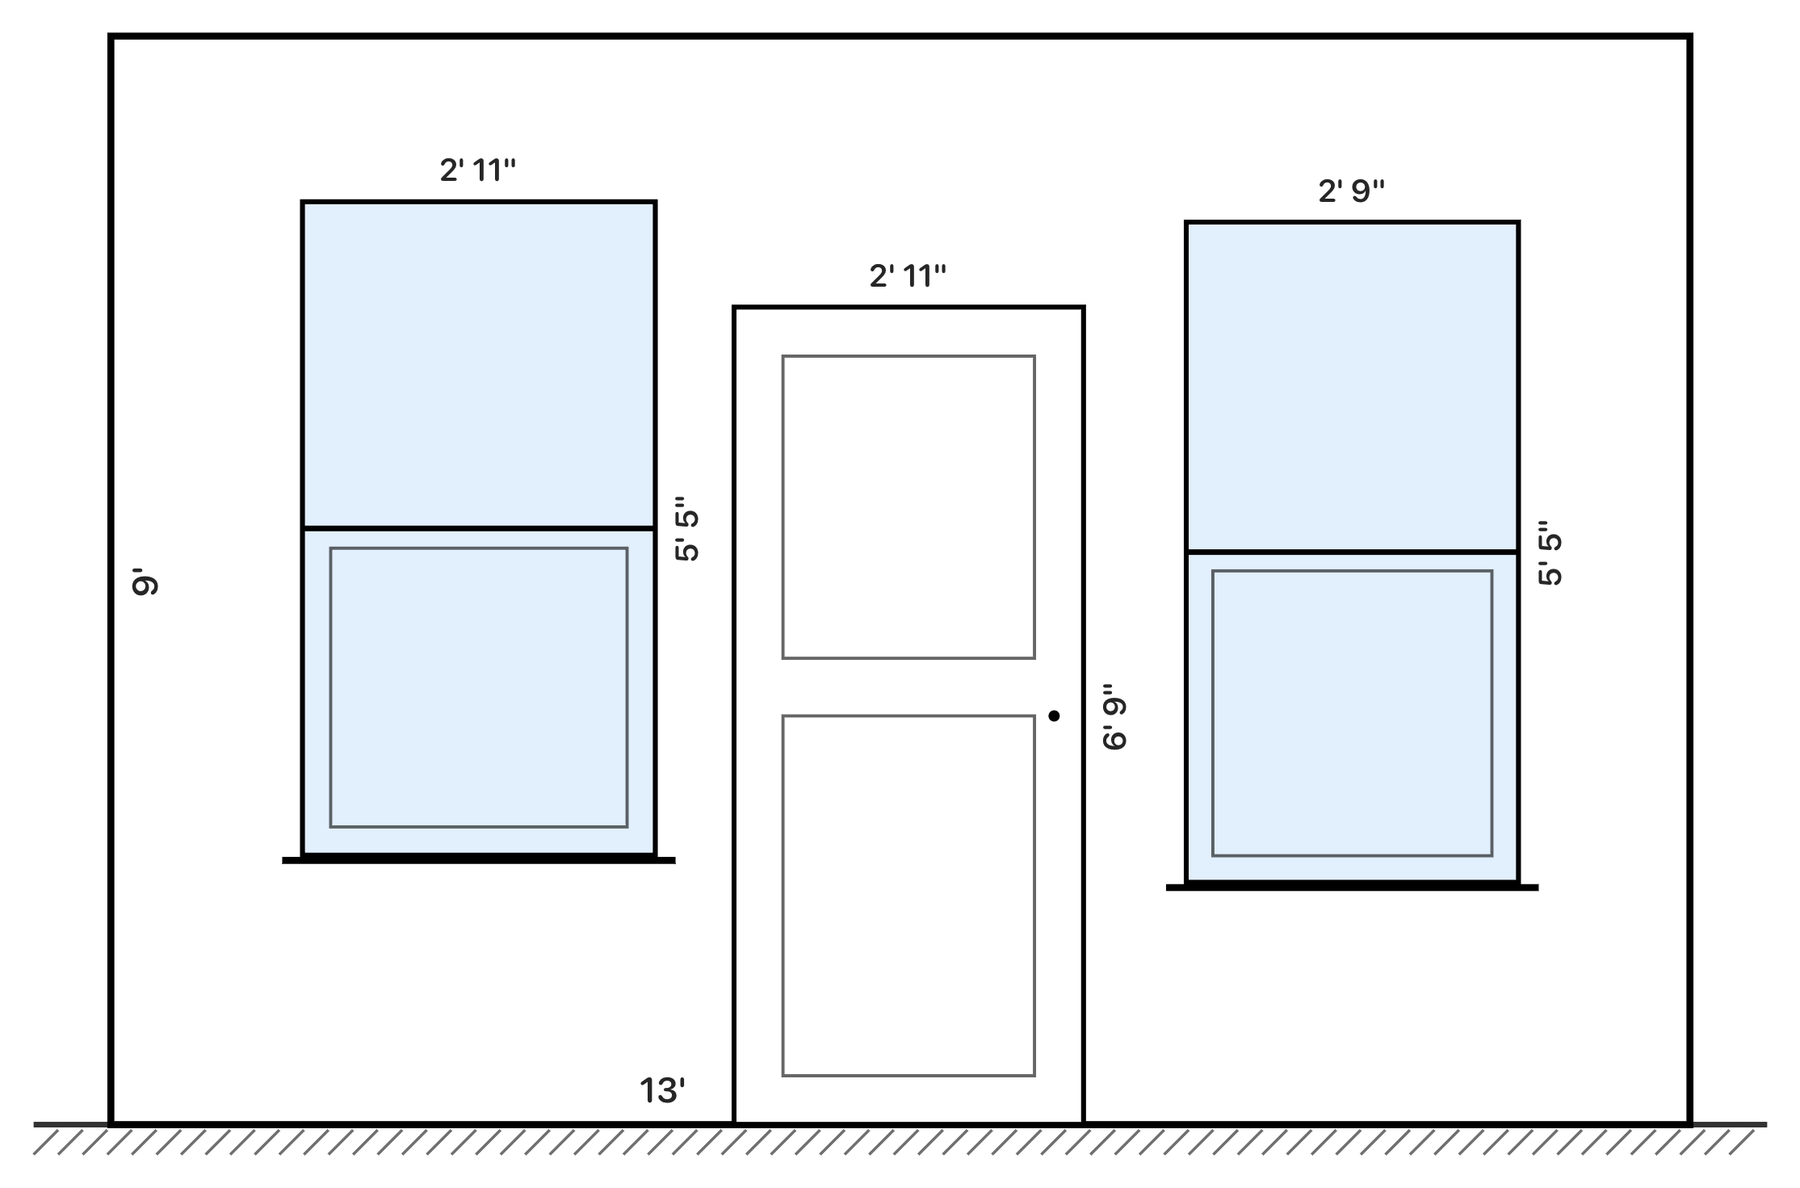
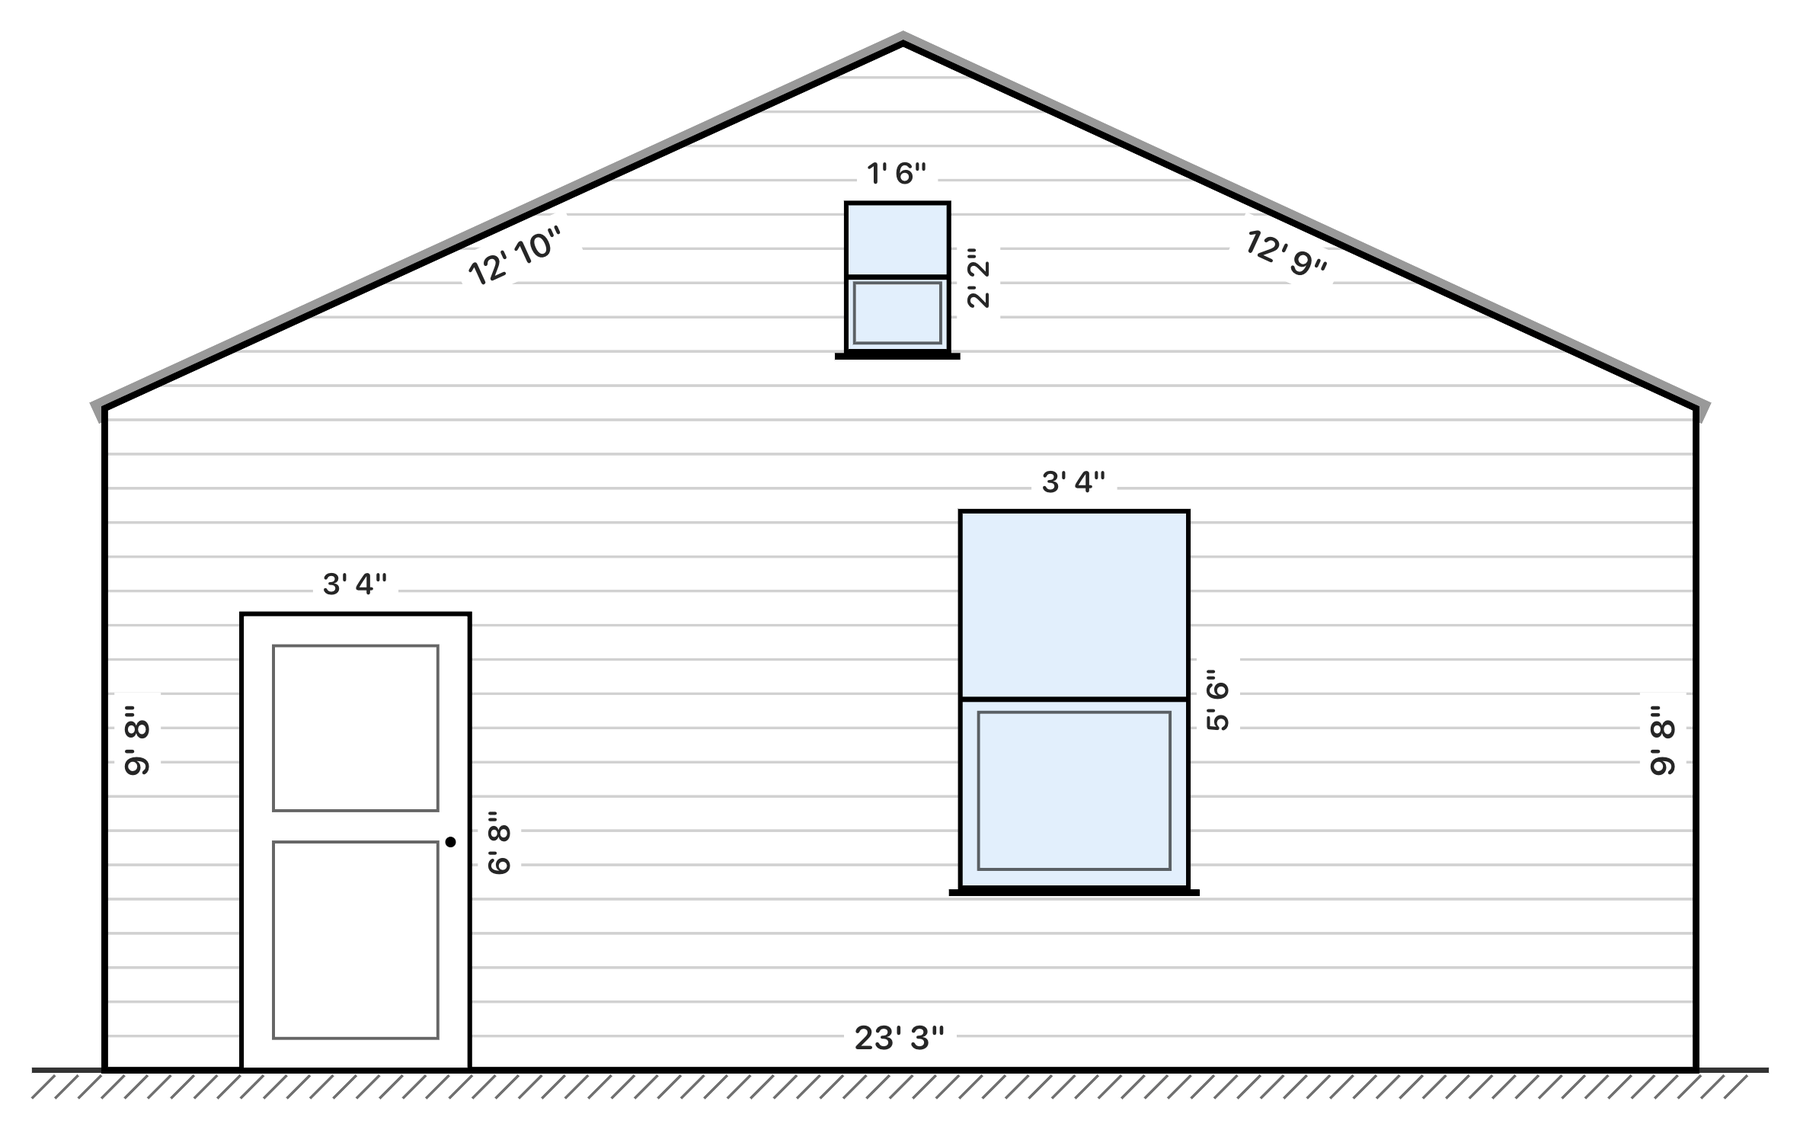
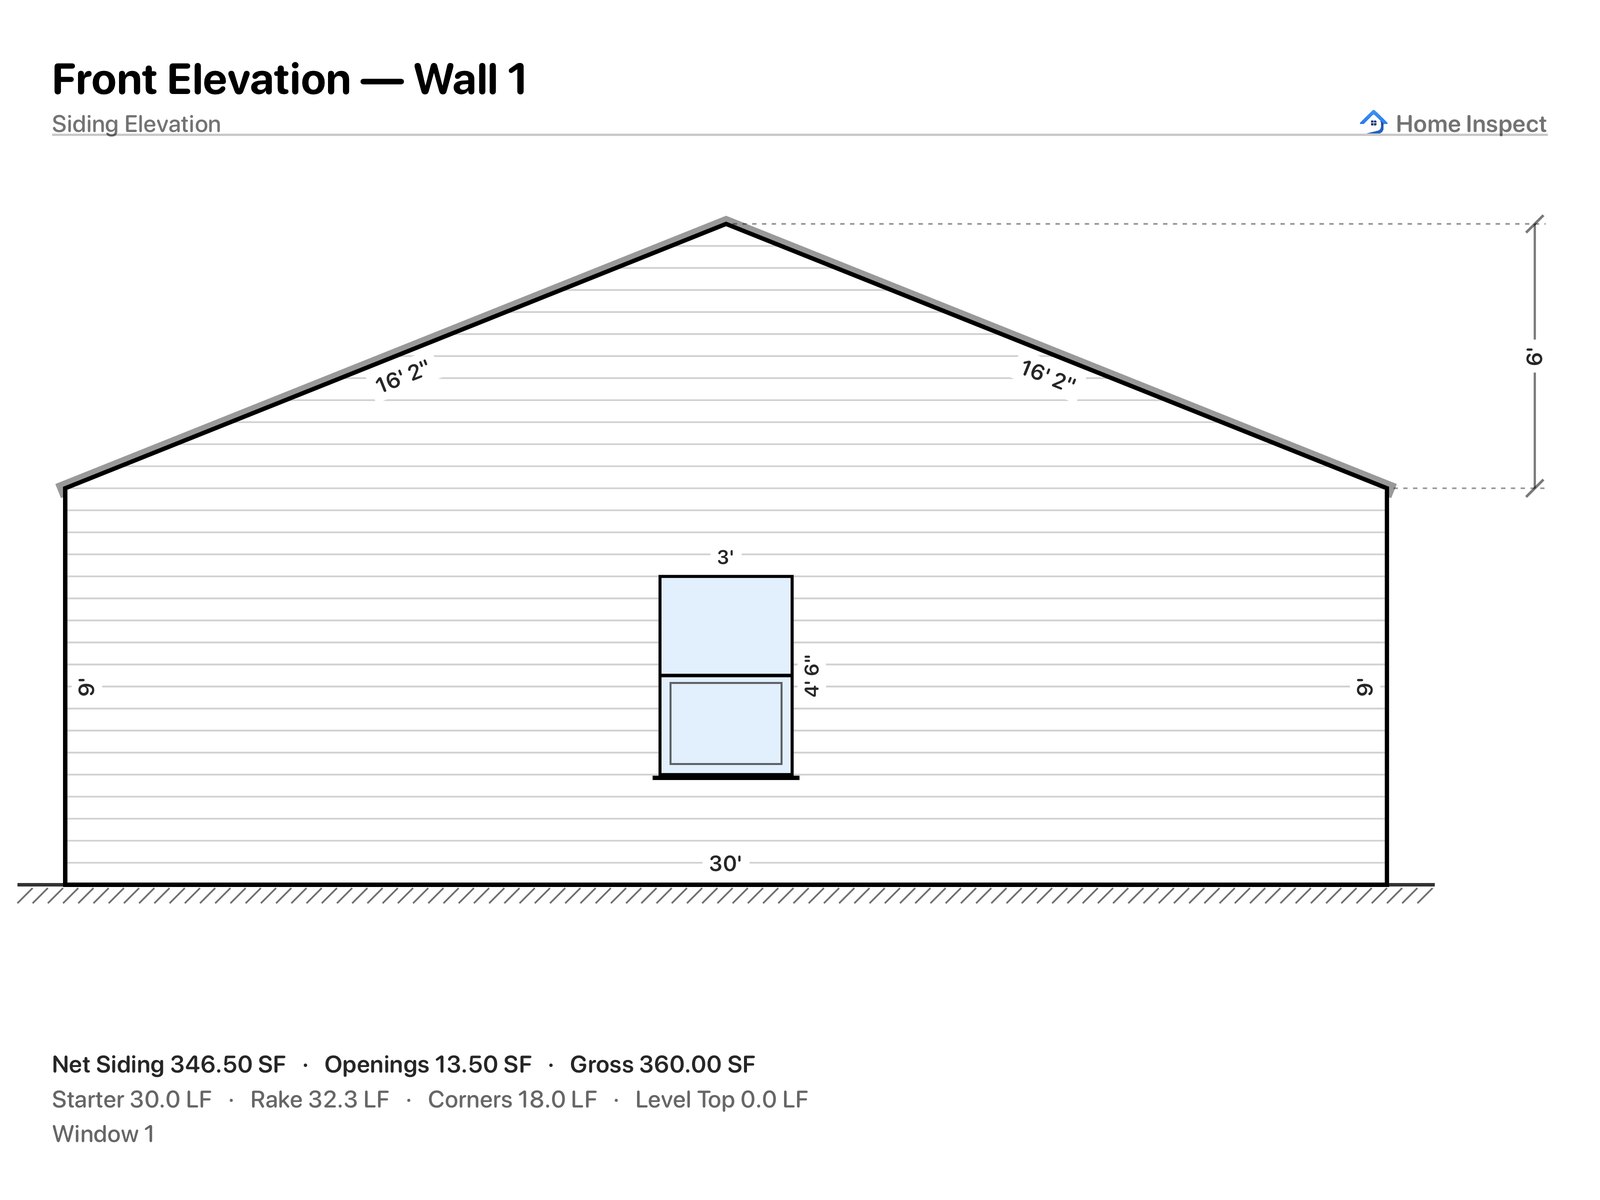
A wall drawn flat with its door and windows
Rooms by LiDAR or by camera Siding, roof and fence figures Photos and one PDF No account, your own iCloud
In 3D

Walk through it in 3D.

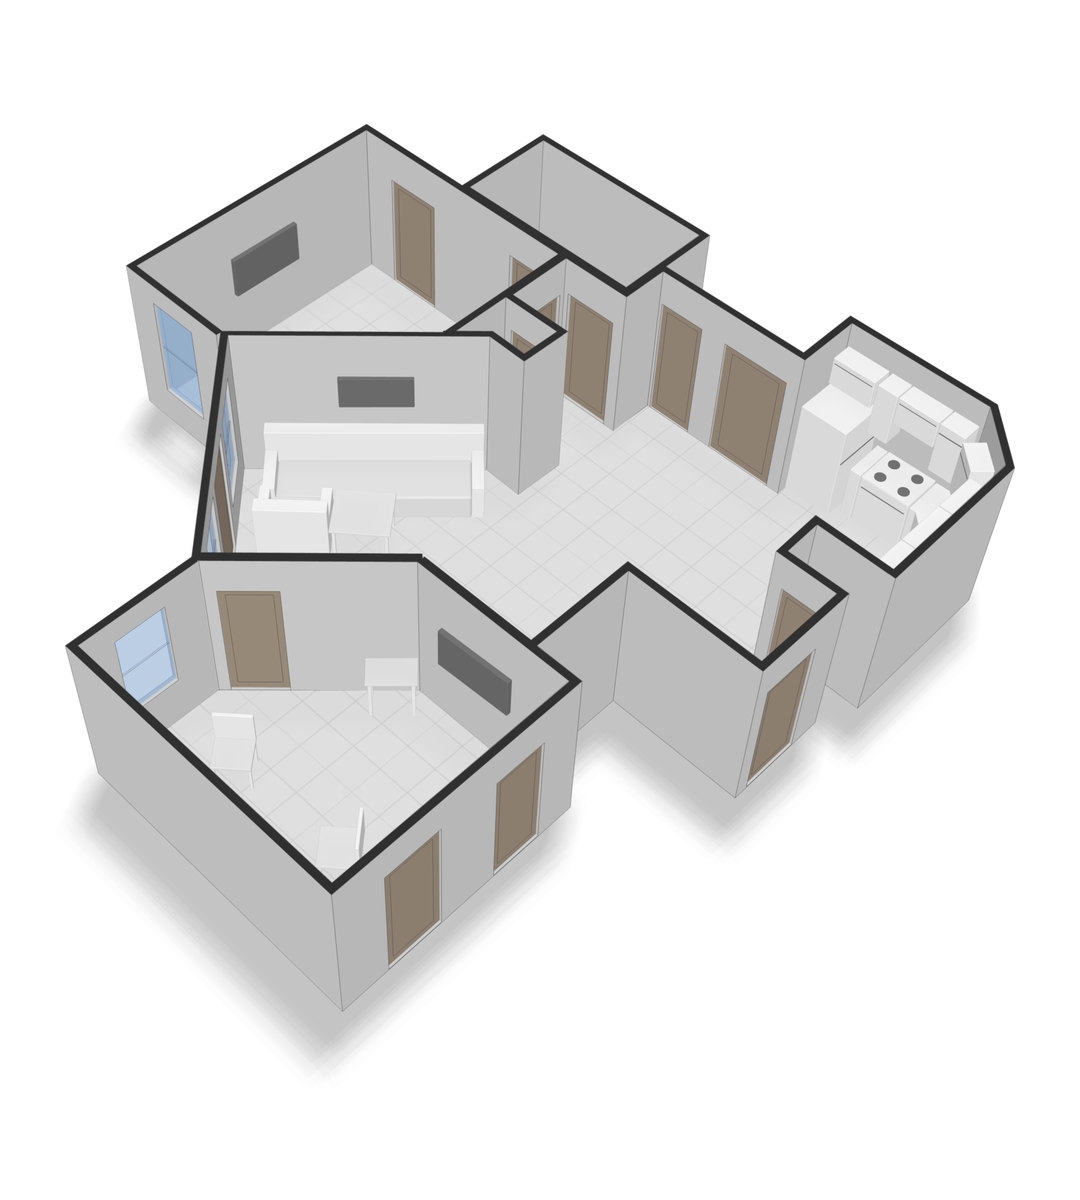
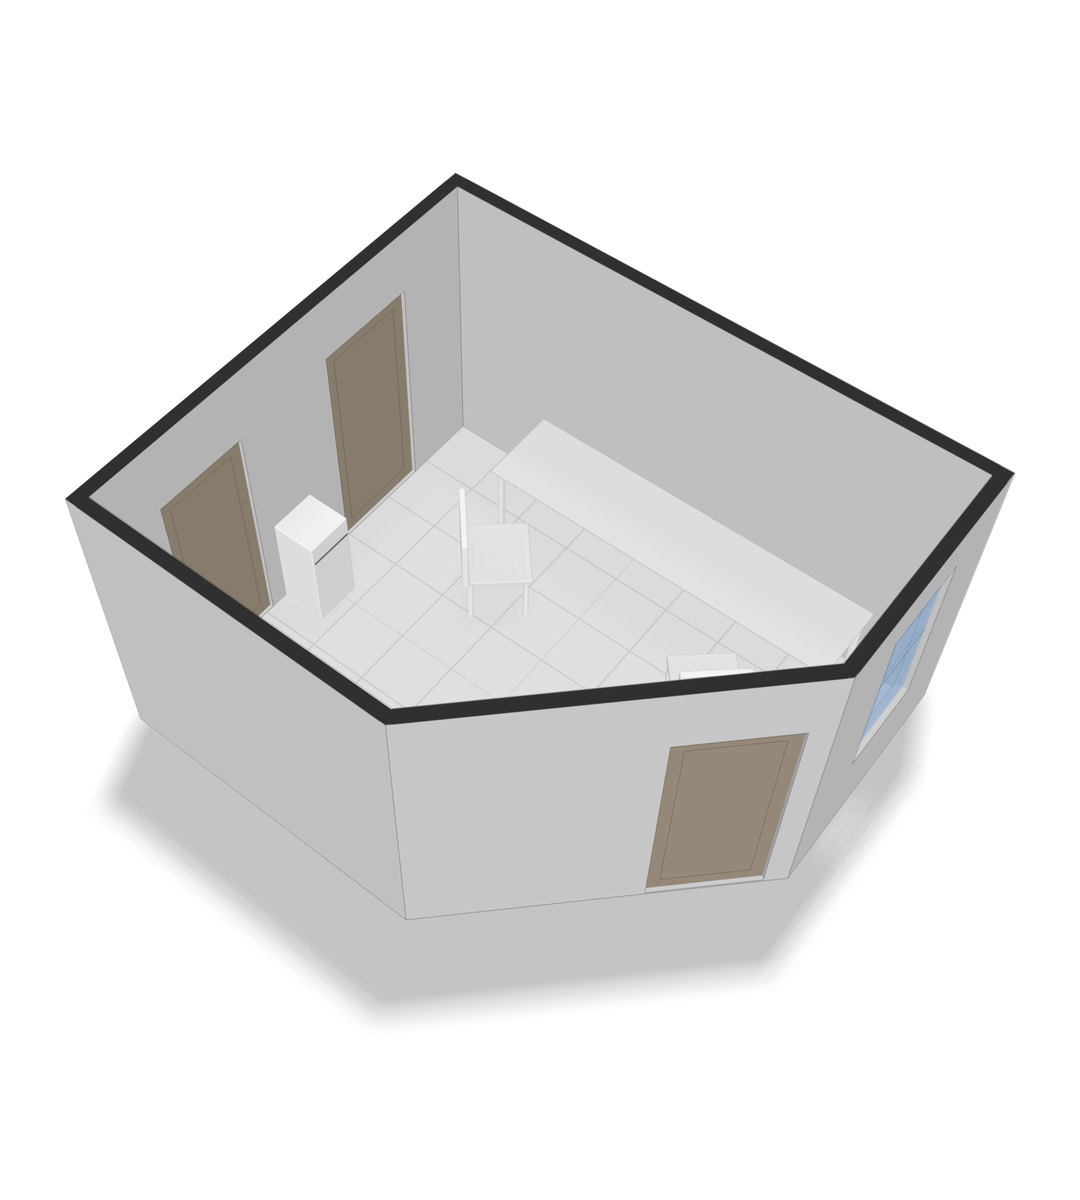
Every scanned room comes back as a model you can turn and zoom, walls fading as you look through them, the furniture where it stood. The whole home together, or one room at a time.

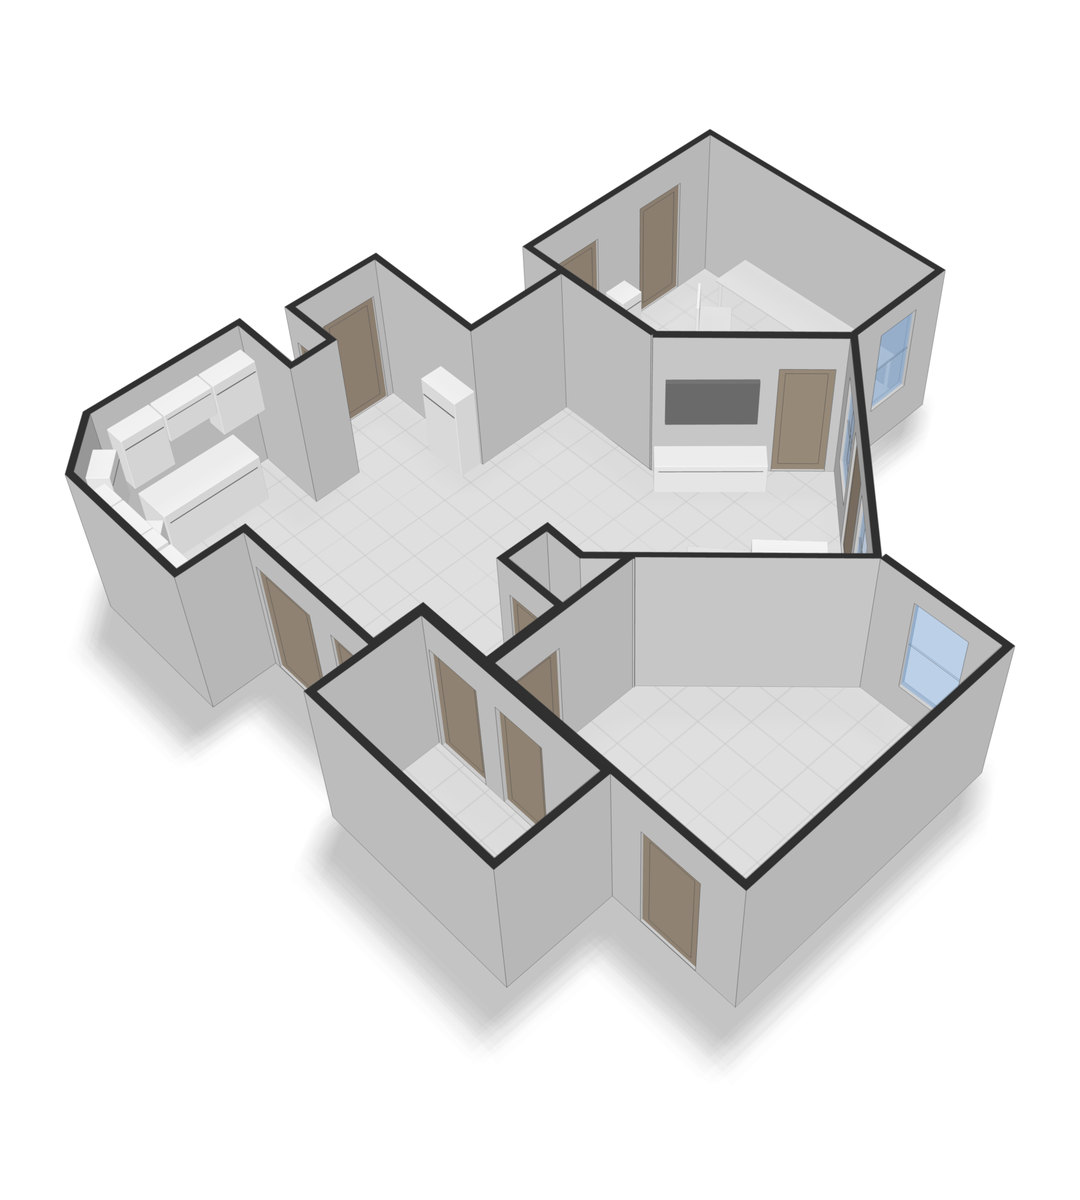
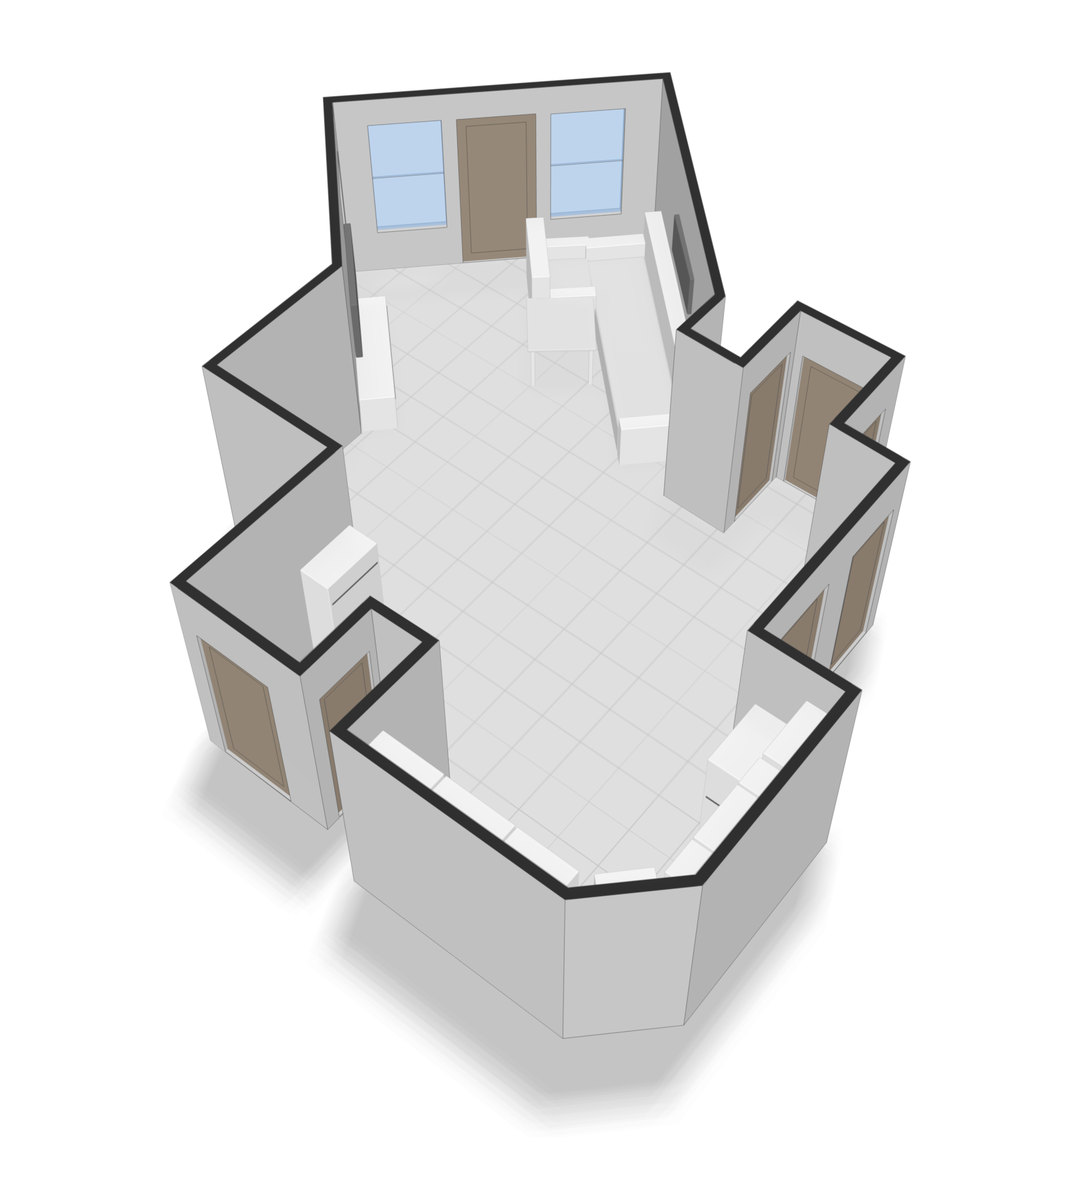
A whole floor of a home as a 3D model from above: every room, door and window, the furniture in place
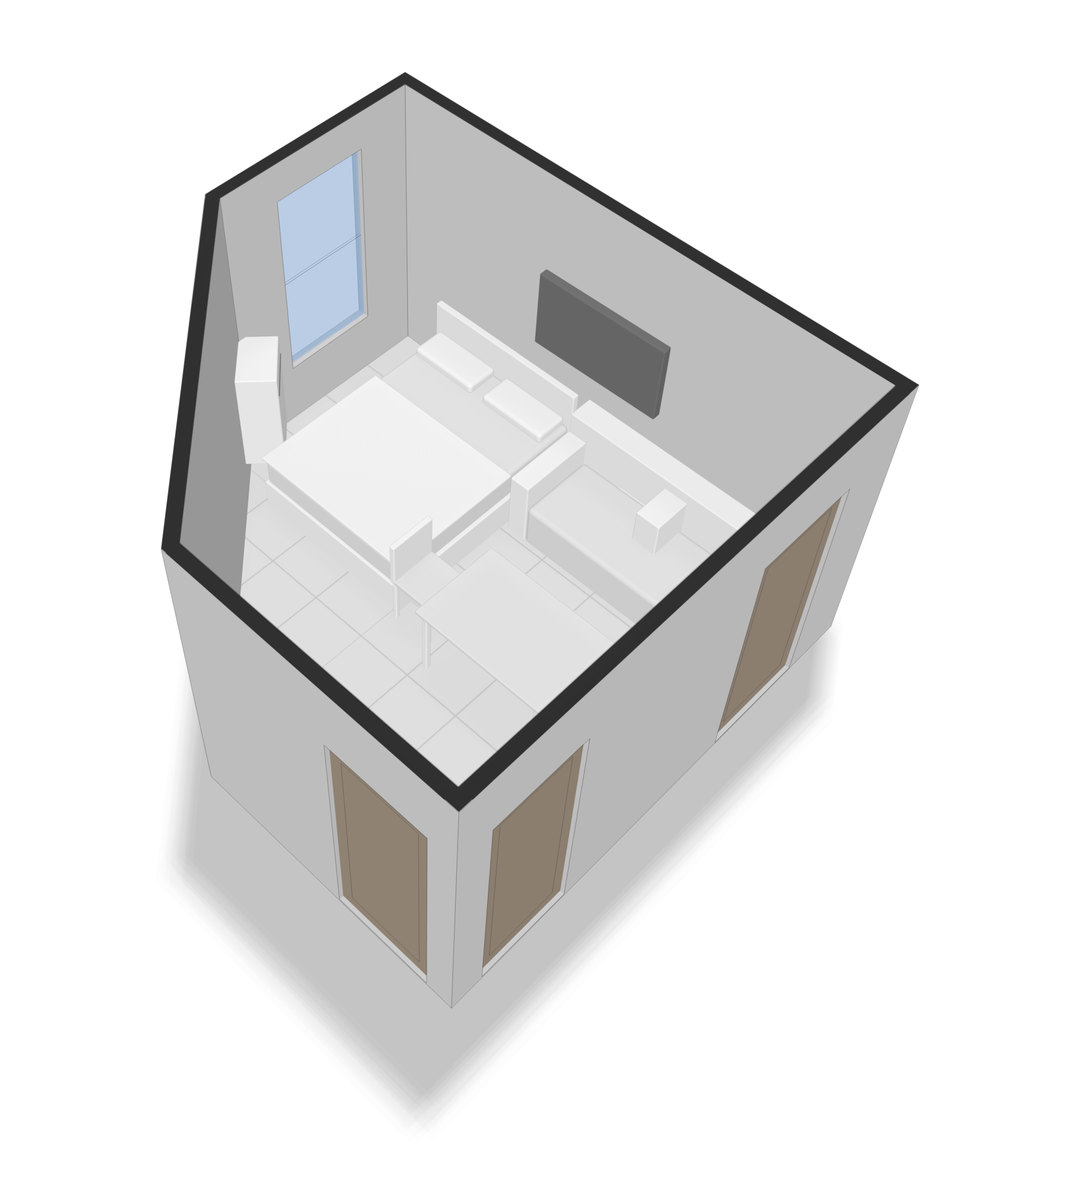
A bedroom as a 3D model: the bed, the TV on the wall, the window
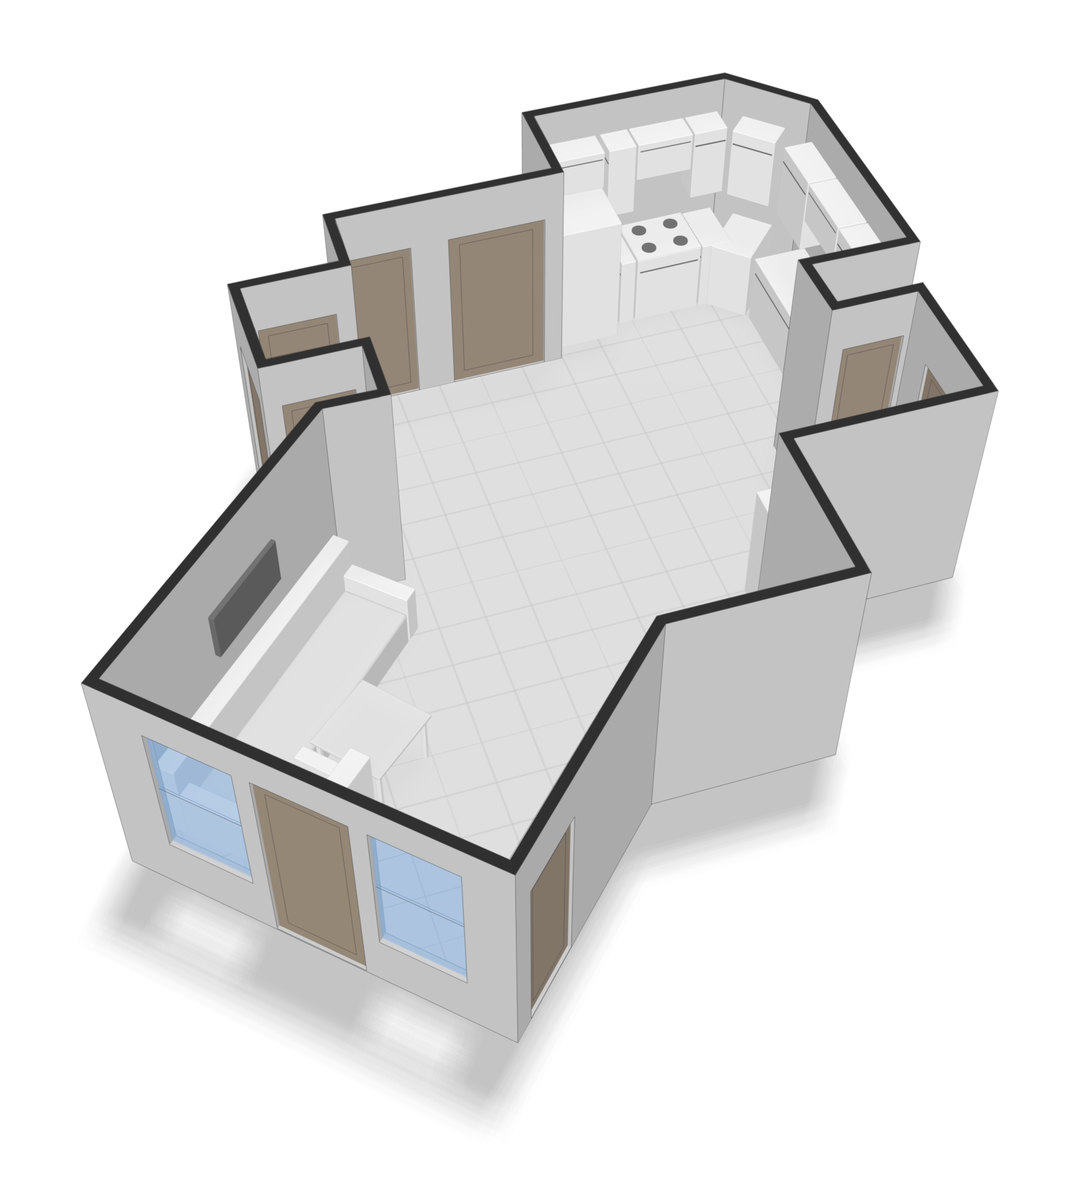
An open kitchen and family room as a 3D model: the stove, the cabinets, the sofa
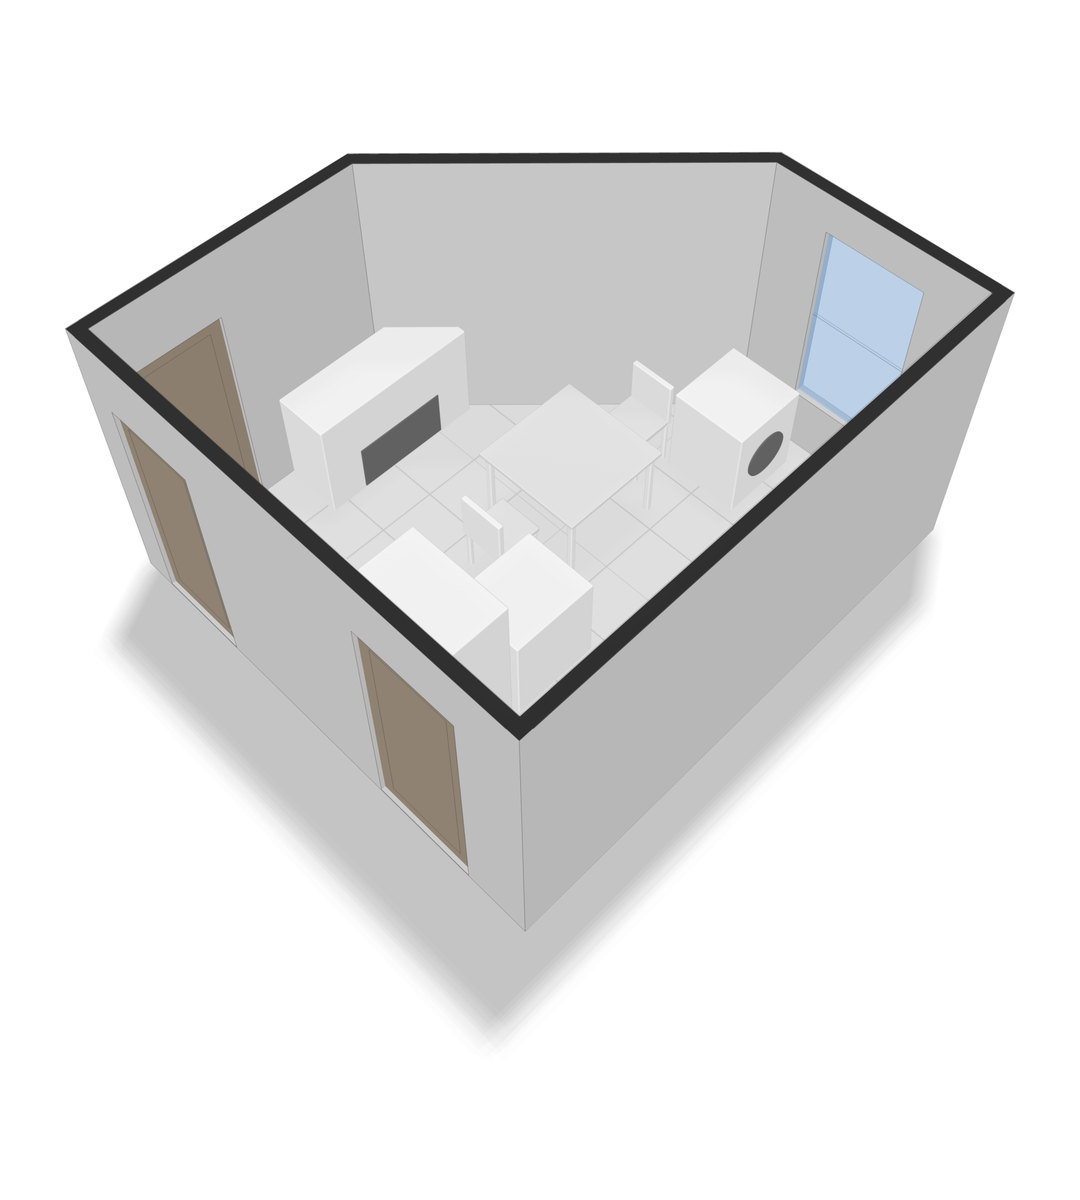
A furnished room as a 3D model: the fridge, the cabinets, the table and chairs
The same floor from the back, the kitchen and the living room furnished
A bedroom as a 3D model with its desk, chair and nightstand
The family room from the other side, its sofa and kitchen in place
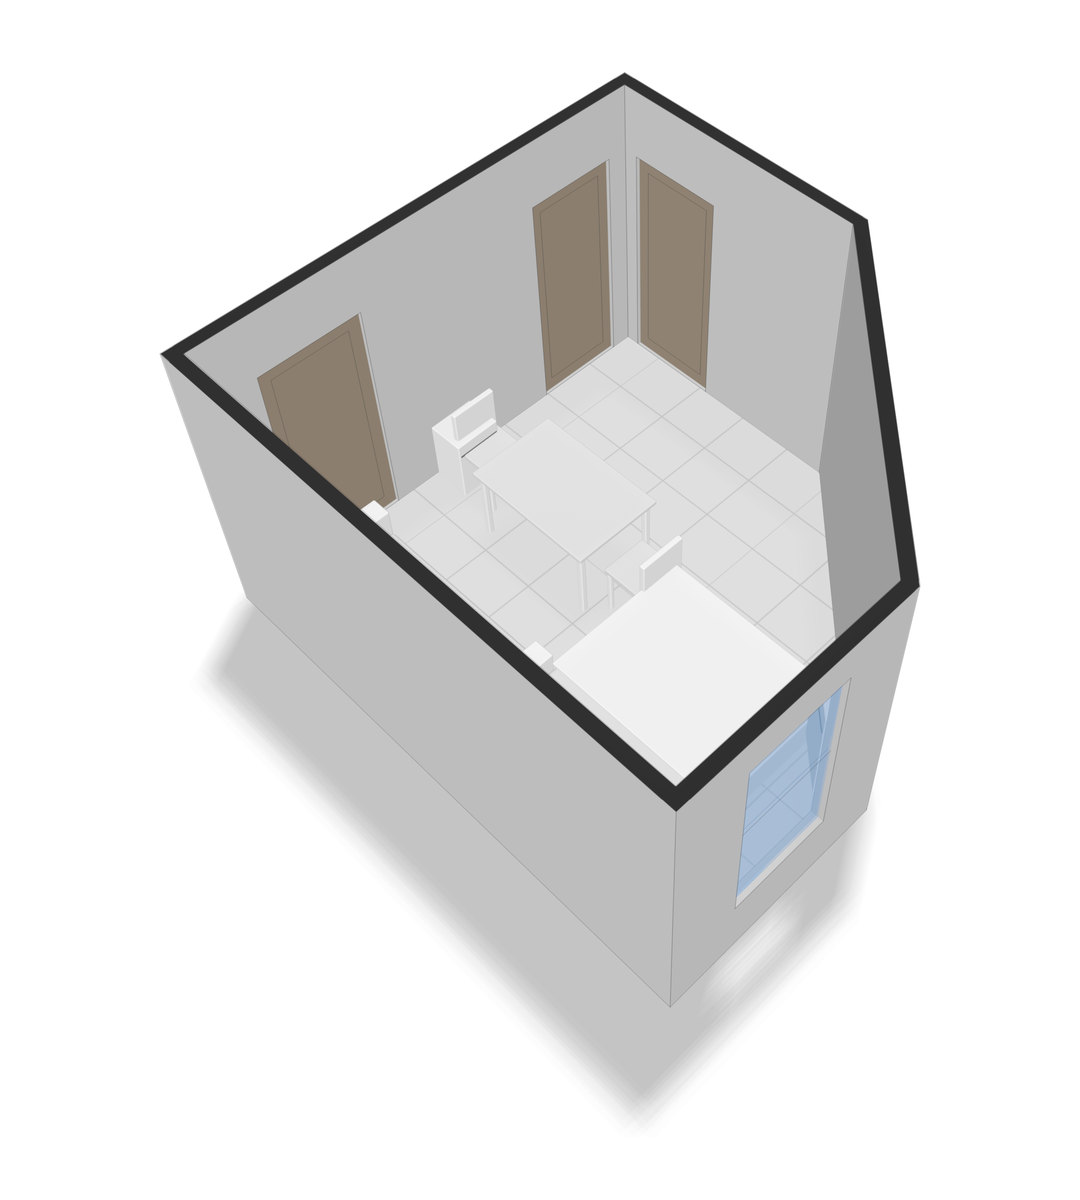
The bedroom from behind: the table and chairs, the bed beyond
Projects

One project for each home.

Name it, type the address, and the home shows from above. Interior, Exterior, Roof and Fence live inside it, with notes, the totals and a camera on every page. Pin the homes you're working on to the top.

Start a Project

One for each home: everything you draw and shoot lives in it.

Tips
  • Tap +, name the project and type the address. Pick it from the list and the home shows from above.
  • Inside: Interior, Exterior, Roof and Fence, a camera on every page, and one PDF of it all.
  • A detached garage or shed? Add Structure keeps its rooms, walls, roof and fence together.
Interior

Rooms, measured three ways.

Walk a room with the LiDAR scanner (iPhone Pro models), tap its corners with the camera on any iPhone, or draw the walls yourself. Either way you get the floor plan, a 3D model and every wall drawn flat with its doors and windows.

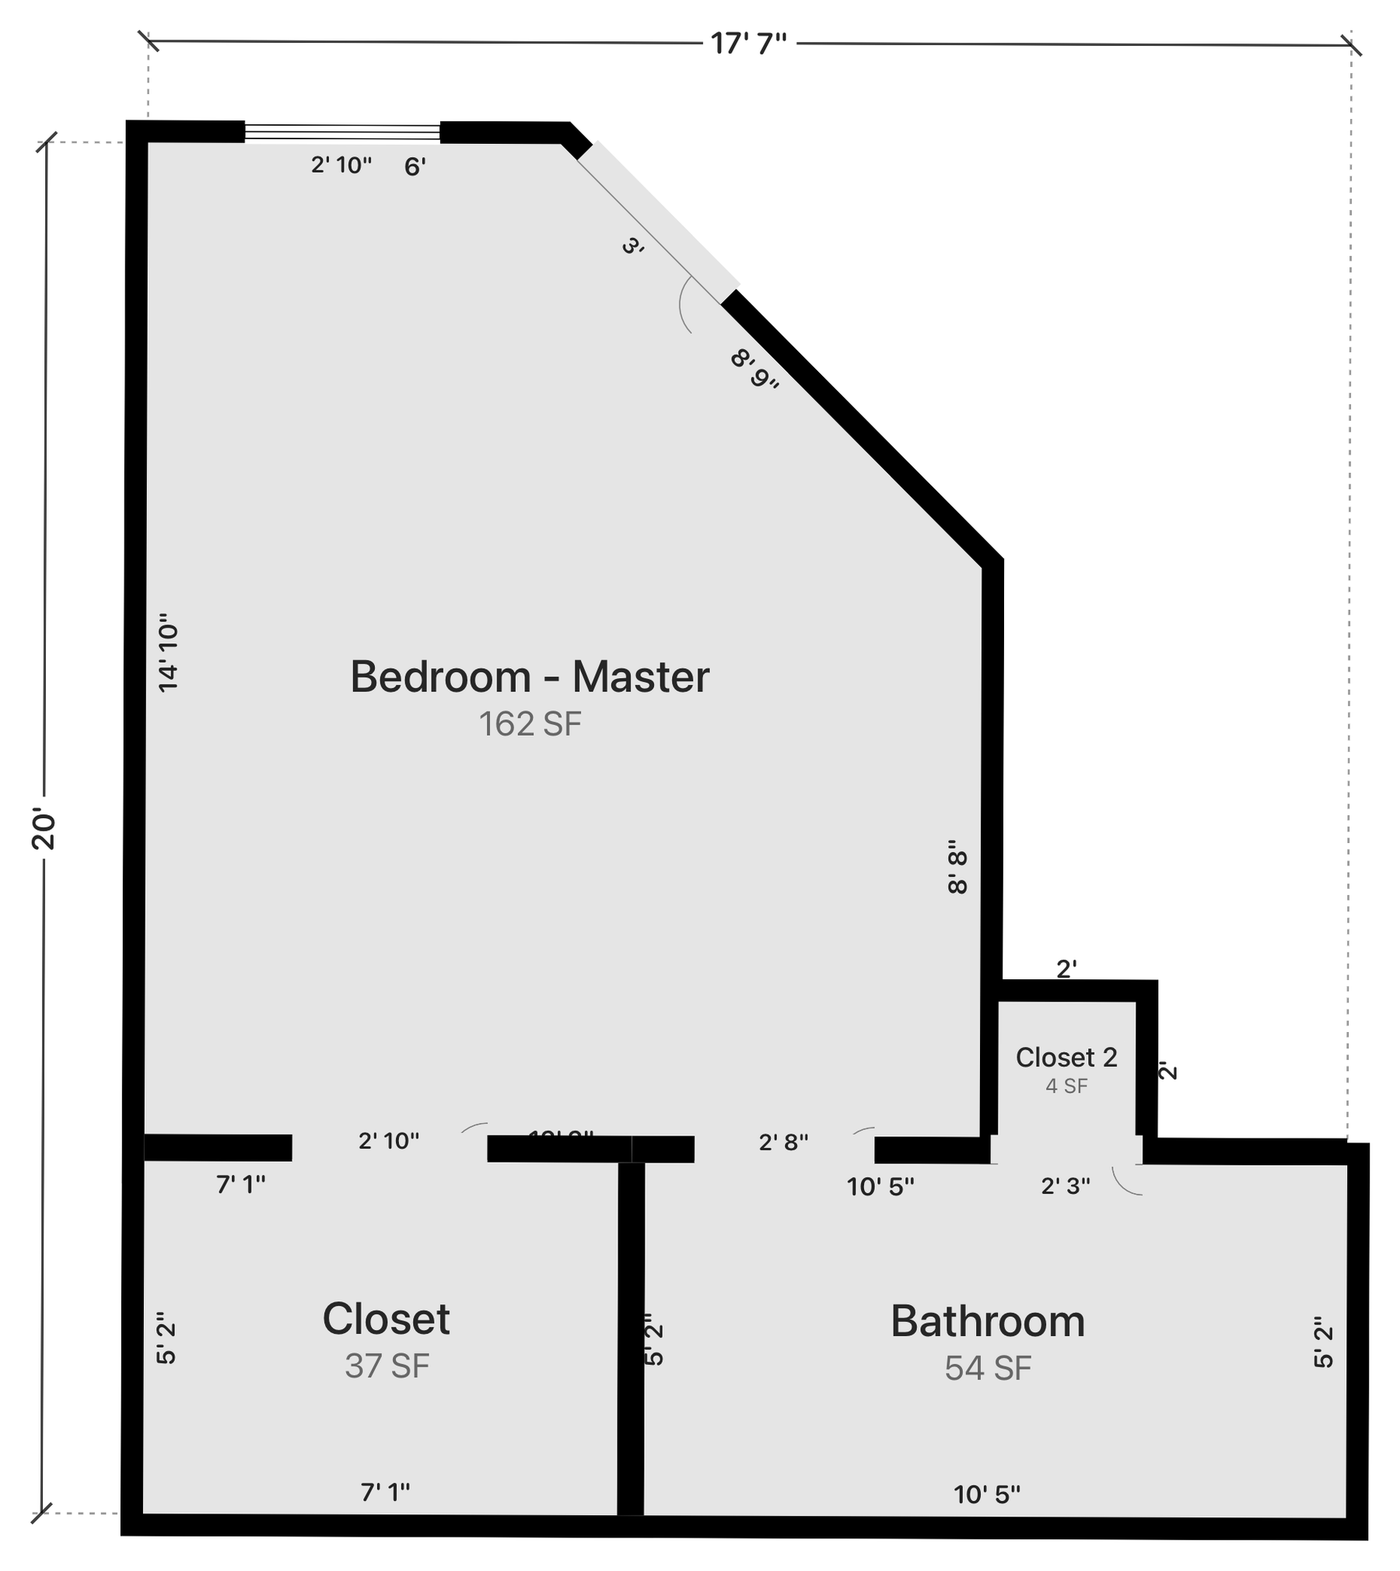
A room's plan: every wall's length, the doors and windows, the area

Scan a Room

Open Interior, tap + and pick the room. Then Detect Walls.

Tips
  • Lights on, doors closed.
  • Hold the iPhone up at chest height and walk the whole room slowly: every corner, floor to ceiling.
  • Tap ✓ when you've walked it all. Or pick Sketch and draw the walls yourself.

Check It in 3D

Before you save, see the scan as a 3D model or a plan.

Tips
  • Two fingers turn it, pinch to zoom. 2D shows the plan.
  • Dims shows every wall, door and window, and the height.
  • Keep the furniture or leave it out, then tap ✓ to save.

Mark the Room's Corners

No LiDAR, or a room the scan won't read? Pick Detect Corners: it works on any iPhone.

Tips
  • Point at the floor and move the iPhone slowly until the grid shows.
  • Aim at each corner where the walls meet the floor and tap the screen. Back on the first corner closes the room.
  • Then point up at the top of a wall and tap for the height, and mark each door and window by two opposite corners.

Add the Next Room

Tap Add Room, pick the room, then tap the door you walk through.

Tips
  • It lands door to door, sharing the wall, so the floor plan builds as you go.
  • Rooms scanned on their own? On the Floor Plan, pick a room, tap Connect, then the same door in each.

Two Rooms in One Scan? Split

For a nook or a second room that came in with the scan.

Tips
  • When the app says Looks Like 2 Rooms, tap Split and name each part. Each gets its own area.
  • Already saved as one? The room's page says it too. Tap Split there.

Tap a Wall

On the room's plan, tap a wall to see it flat with its doors and windows.

Tips
  • Tap a wall to see it flat, with its size and net square feet.
  • Edit, then Add, puts in a Door, Window or Opening. Drag it into place; tap a size to type it.
  • In 2D, tap any length to type the real figure.

Every Figure, Checked

Each room's page adds it all up.

Tips
  • Floor, ceiling, walls net and gross, perimeter and ceiling height, with the doors and windows counted.
  • Share prints a clean floor plan with every wall length.

The Whole Home's Floor Plan

Interior, then Floor Plan: every room together, with its area.

Tips
  • Rooms scanned on their own? Tap a room, then Connect: tap the blue circle on its door, then the circle on the other room's door, and they join wall to wall.
  • Long press a room to move it; it snaps to the one beside it. Rotate turns it. + Floor adds the basement or upstairs.
Exterior

Every wall of the house, with its siding figures.

Scan a wall with the camera or sketch it from a shape, add the doors and windows, and the net siding comes out on a clean sheet with the starter, rake and corner lengths.

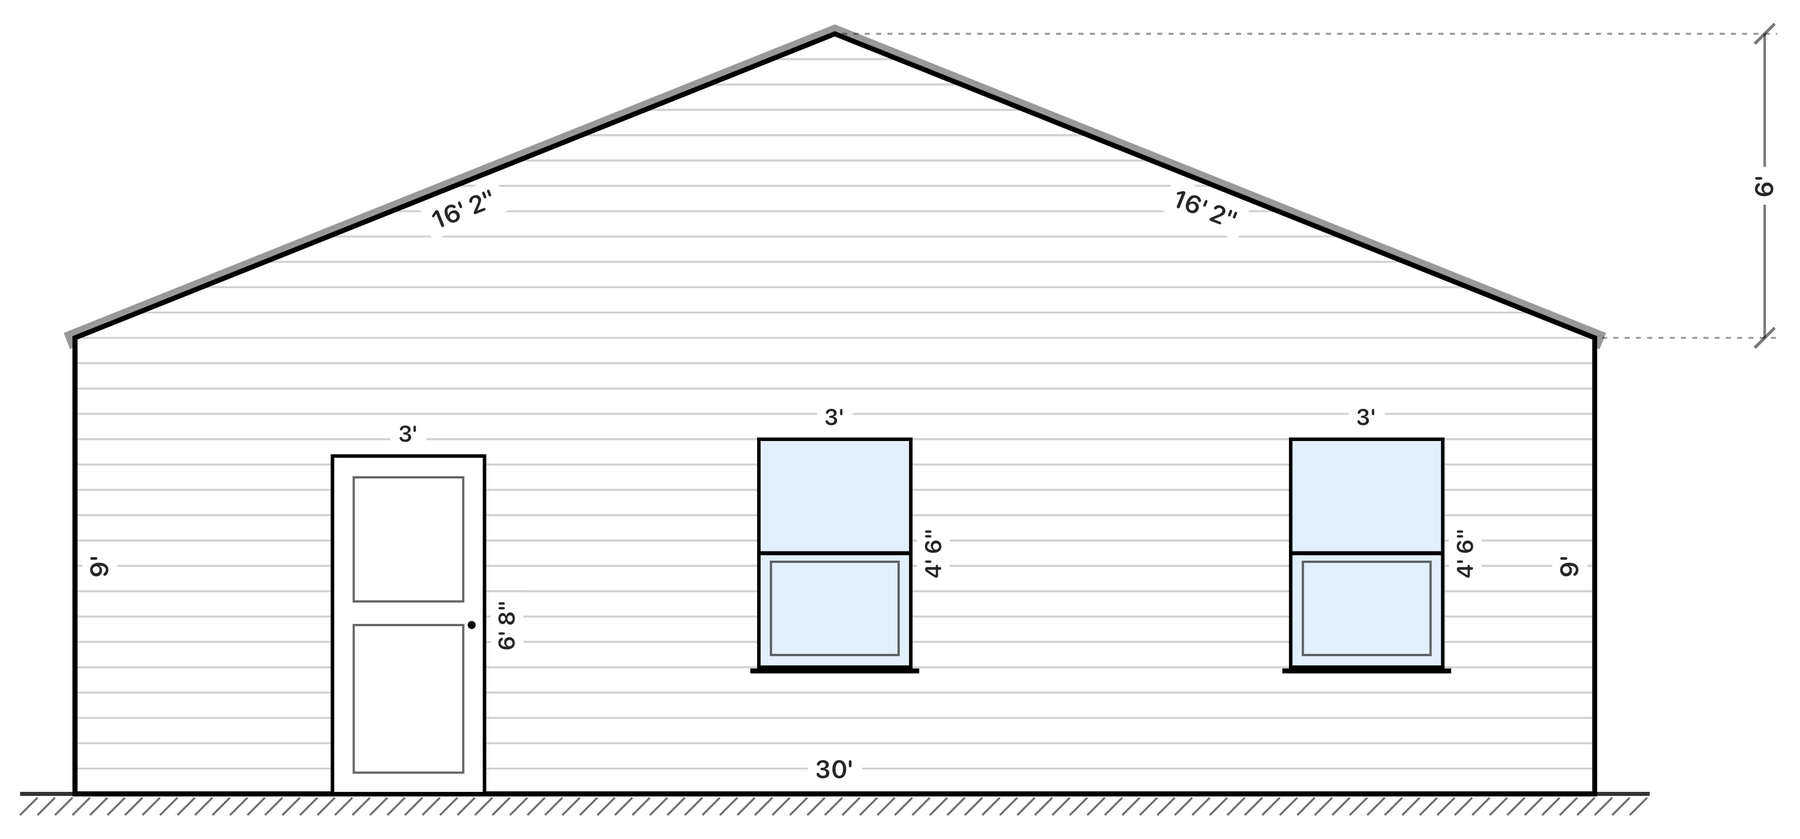
A gable wall with a door and two windows, every length marked

Scan a Wall with the Camera

Open Exterior, tap + and pick the side. Then Scan with Camera.

Tips
  • Put the crosshair on each corner of the wall and tap, all the way round to the first.

Then the Doors and Windows

Still in the camera: two corners each.

Tips
  • Pick Door, Window or Garage Door and tap two opposite corners of each.
  • Tap ✓ and the wall opens in the editor with every opening in place.

Or Sketch It by Hand

Sketch by Hand, then Shape: Gable, Shed, Gambrel, Split Level and more.

Tips
  • Drag the corners into place, or tap any figure and type the real size.
  • Tap + on a line to add a corner. Piece adds a separate section.

Everything on the Wall

Add puts on a Window, Door, Garage Door, Gable Vent, Shutter, Light Fixture or Exhaust Vent.

Tips
  • Type picks the kind: Double Hung, Casement, Bay, French Door, Sliding Patio and more.
  • Style makes it Arch Top, Half Round, Round or Octagon and takes off its true area.
  • The bar shows the net siding. Export makes the sheet with the starter, rake and corner lengths.
Roof

The roof from above.

Drop in shapes or trace the lines, letter the facets, set each pitch, and the square feet follow. Map puts the real home under your drawing.

A roof from above, nine lettered facets

Draw the Roof from Shapes

Open Roof, tap + and Draw a Roof. Then Shape.

Tips
  • Tap a shape to add it, drag it into place, pull a side to size it.
  • Style sets Hip, Gable, Dutch or Clipped ends, Gambrel, Mansard or Flat.
  • Under Tools, Letters: tap a facet to set its letter and pitch, join it or split it.

Or Draw It with Lines

Shape, then Draw Lines: tap where each line starts and ends.

Tips
  • Trace the roof's edges, ridges, hips and valleys line by line.
  • Under Tools, Letters: tap a shape your lines close to letter it, or Letter All does every one.
  • Tap a lettered facet to set its pitch, and the roof's square feet follow.

Mark What's on the Roof

Tap Mark, pick what it is, then tap the plan.

Tips
  • Test squares, vents, pipe jacks, chimneys, skylights, satellites, solar panels and tarps.
  • Note puts your own words anywhere on the plan.

Tap FRONT to Move It

It moves to the next side, clockwise, until it faces the street.

Tips
  • The facets take their names from it: Front Slope, Right Slope and so on.
  • Tap the compass to turn north a quarter.

Map, Measure and Pitch

Trace it true, then let the app do the math.

Tips
  • With the address in, Map puts the home from above under your drawing. Line Up Map matches them.
  • Under Tools, Measure gives the area from each facet's pitch. Lengths shows the hips, ridges and valleys.

Letter the Facets

Under Tools, Letters: tap a facet, pick its pitch, and the square feet follow.

Tips
  • Every facet gets a letter, so the sheet and the PDF can name them.
  • Set a pitch from the list or type any pitch; the area is worked out from it.
  • Join two facets into one, or split one in two.
Fence

The fence, run by run.

Lay it out around the house, add the gates, pick the style and height, and see every run face-on. Mark potential damage and the totals add it up.

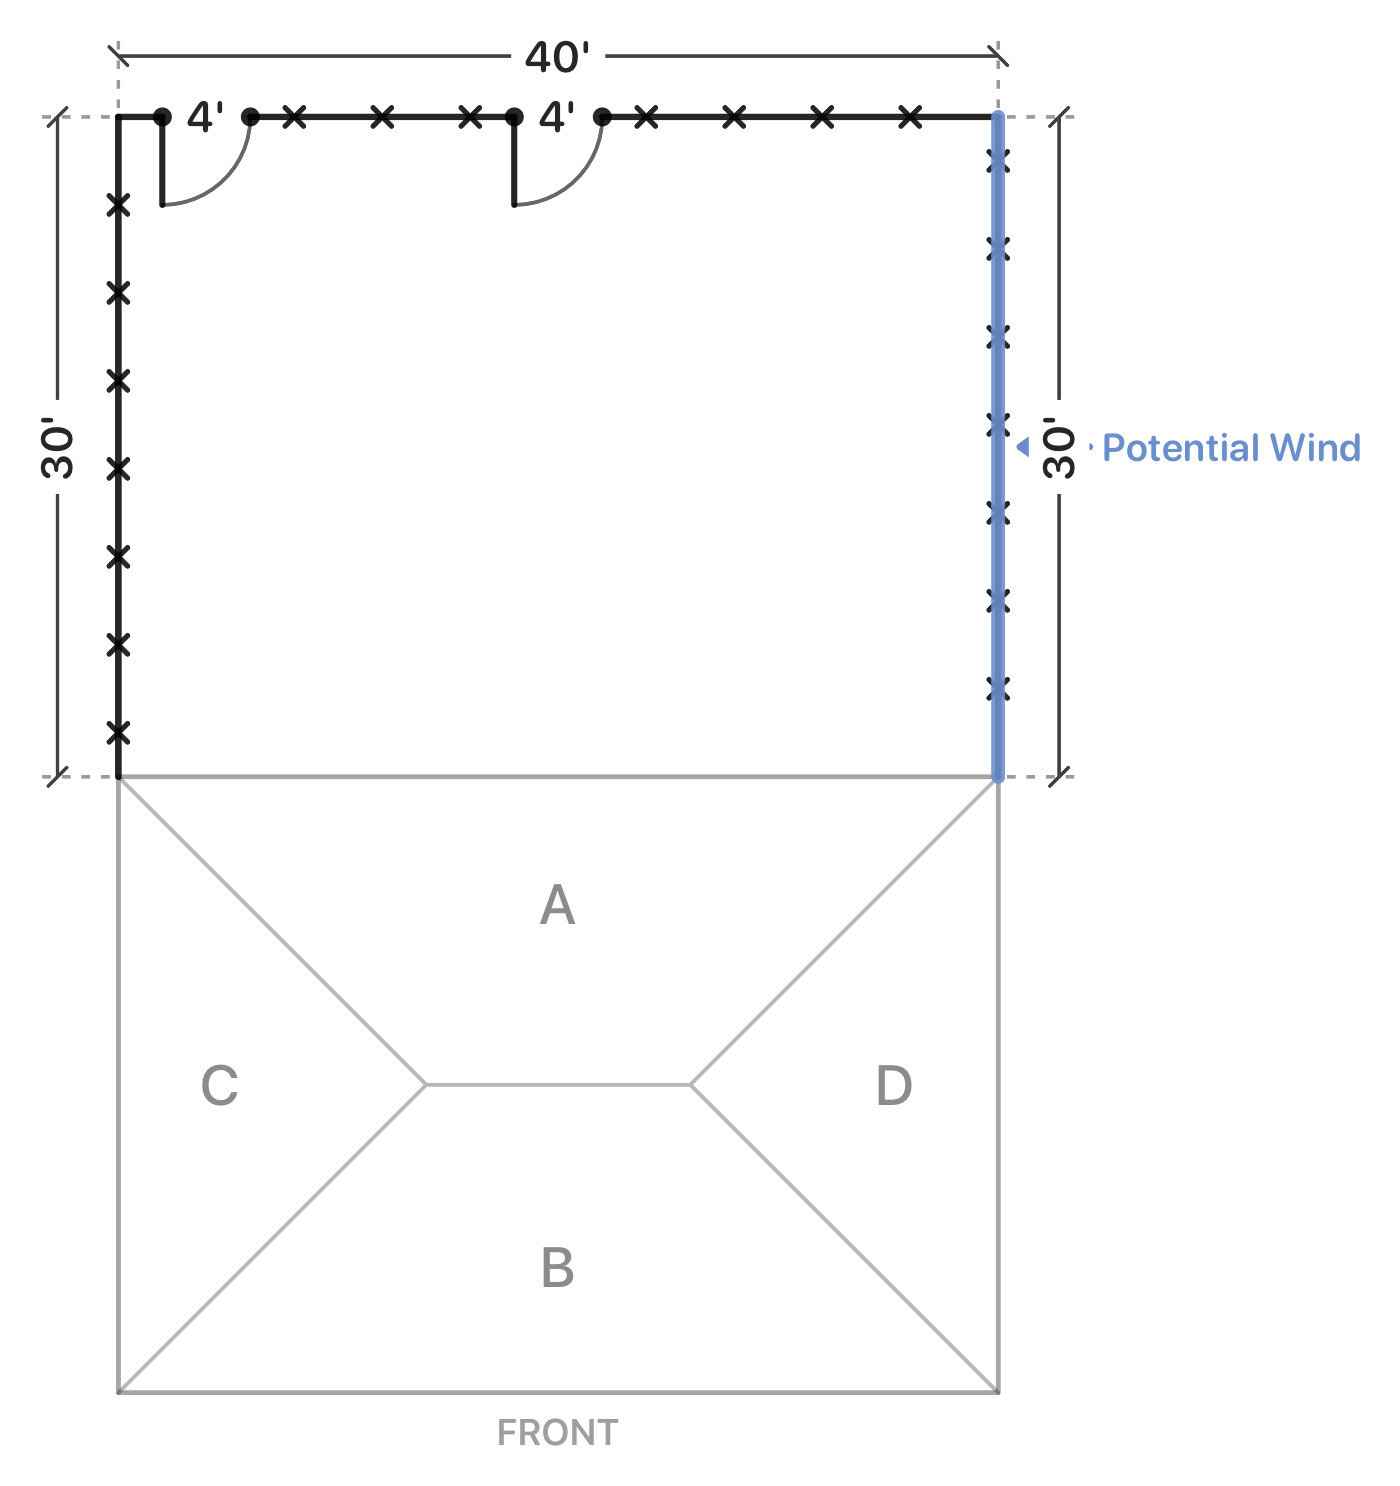
A fenced back yard behind the house: two gates on the back run, the right run marked as potential wind damage

Lay Out the Fence

Open Fence and tap +. The first run starts behind the house.

Tips
  • Drag the corners into place. Tap + on a run for a corner, or an end and then Run to keep going.
  • The house underneath is your roof drawing, or a Plain House you size and turn.
  • Line adds a separate stretch of fence.

Add the Gates

Tap a run, then Gate.

Tips
  • Width sets its size. Style swings it In or Out, Single or Double.
  • The totals list the gates: 1 gate (4').

Style and Height

Style: Privacy, Board on Board, Shadowbox, Picket, Split Rail, Chain Link, Vinyl or Metal.

Tips
  • Height 4', 5', 6' or 8', or type any height.
  • Elevation draws every run face-on: posts, rails, boards and gates.

Potential Damage, Run by Run

Tap a run, then Damage: Spatter or Wind.

Tips
  • Mark the whole run or part of it, which side, and the posts in the damaged stretch.
  • The bar adds it up: LF, SF (LF × height) and the gates.
  • The PDF's plan and elevation show every damaged run: orange for Spatter, blue for Wind.
Photos & PDF

Photos where they belong, and one PDF of it all.

Every page has a camera, and every photo lands under its room, wall, roof or run. Then one PDF: a cover page with the summary, a sheet for each room, wall, roof and fence, and the photos two to a page under their captions. Pick the sheets, set the order, put your name or your company's logo on every page, share it.

The floor plan sheet
The siding sheet
The roof sheet
Cover name, address, date and totalsRooms plan and every wallWalls siding figuresRoof facets and pitchesFence plan and elevationPhotos captioned

Photos for Every Sketch

Tap the camera at the top of any page.

Tips
  • Take as many as you need, then tap Done to caption them.
  • Each tool's camera files them under that room, wall, roof or run.
  • Open a photo and tap the pencil to crop, turn or draw on it.

One PDF

On a project, tap the page button, then Create PDF.

Tips
  • Tap a sheet's circle to leave it out. Reorder sets the order.
  • A cover page with the summary, then a sheet for each room, wall, roof and fence.
  • Share it from the preview.
The app

Ten screens, one long picture.

The App Store pictures, end to end: a project, the floor plan, every wall flat, the siding sheet, the roof from above, the fence run by run and face on, your look, the PDF.

Ten App Store pictures side by side: tilted phones showing a project page, a floor plan, a wall elevation, a siding sheet, a roof over the home from above, a fence plan and its elevations, the dark look, the PDF page and the projects grid
Private by design

Your work stays yours.

No account to make and no server of ours. Only you and the people you share a project with can open it, never us.

Your own iCloud

Projects live on your iPhone and in your own iCloud, so they show up on your iPad and Mac and come back if you reinstall. Turn the backup off in Settings and they stay on the phone alone.

Groups

Start a group and invite your crew. A project you share stays in your own iCloud; everyone in the group can open it and work on it. Leave, and your projects come back with you.

Nothing to track

No analytics, no advertising, no tracking of any kind. Photos lose their location the moment they're added. The privacy policy says it all in plain words.

One price
$9.99 a month
or $79.99 a year

The first month is free. Apple handles the subscription; change or cancel it under Subscriptions in your Apple Account, any time.

Interior, Exterior, Roof, Fence, photos, groups and the PDF, on your iPhone, iPad and Mac. Feet and inches or meters, and a light look or a dark one.

Coming to the App Store